

Light is light series, Episode 4: What if there’s no Ambient light?
When natural light disappears, your strategy can’t. Whether it’s a rainy wedding day, a dark church, or a side room with fluorescent lighting, the ability to build light from scratch separates pros from beginners. In this blog, I’ll walk you through how I evaluate a room, build my light step by step, and pose with purpose to create cinematic portraits anywhere.

Las Vegas workshop tickets are live!! read this to save 85$
tickets are officially live! Join me in Las Vegas for an exclusive lighting and business workshop designed to level up your photography game — limited seats, lifetime impact.
🚨 Save your seat.
On March 2, 2026, we’ll be back at Nelson Ghost Town, Las Vegas with the legendary Julie Gayler for the most 🔥 off-camera flash workshop of the year. Cinematic portraits, step-by-step instruction, portfolio-worthy images, epic location, professional models dresses with wedding attire AND fine art portraiture, this is the one you don’t want to miss. Click HERE to save your seat.

And this year… we’ve raised the stakes.
👉Upgrade: Theory + Nelson Ghost Town Workshop — $850 (Only 10 seats for both classes, 20 seats for the desert class!). And if you are a member of “ The Braulio Way “, or have attended any of my previous workshops, type in promo code “BraulioWay10” for a 10% discount, that’s 85$ you’re saving for two incredible classes in the same day. But you have to hurry, these tickets will see fast.
This small-group intensive includes the Nelson workshop PLUS:
Dark Ceremonies, Solved: clean exposure & color even in brutal lighting.
Reception Mastery: my triangle of light setup for crisp, dimensional reception shots—fast.
Business Mindset That Works: pricing, positioning & scripts to book more and upsell without being salesy.
- Only 10 seats for the upgrade. Once they’re gone, this track closes forever. And if you are a member of my mentorship program or attended one of my previous workshops, save 85$ if you book both classes.
If you’ve been waiting for the workshop that separates the pros from the amateurs, this is it. Those who attend will walk away with the knowledge, the shots, and the confidence that others will wish they had.

Light is Light Series Ep 03: Using light with purpose on real wedding days.
From harsh sun to soft portraits, light is light. Learn how I used Sunny 16, lens choice, and posing to shape dramatic and romantic wedding images.
In the last post, I promised we’d take this series one step further, less theory, more action. Today, we’re diving into real wedding images I created with off-camera flash (OCF). Some shots were built entirely with flash as the main source, others are a blend of flash and natural light.
The goal here isn’t to throw numbers at you, it’s to show you how I approach tricky lighting conditions, the thought process behind my settings, and how light, whether harsh or soft, can always be shaped into something beautiful.
Let’s break down the first image.
Q: “this shot of Sabrina and Michael in downtown Montreal looks insane. Midday sun, harsh light, how did you even pull this off?”
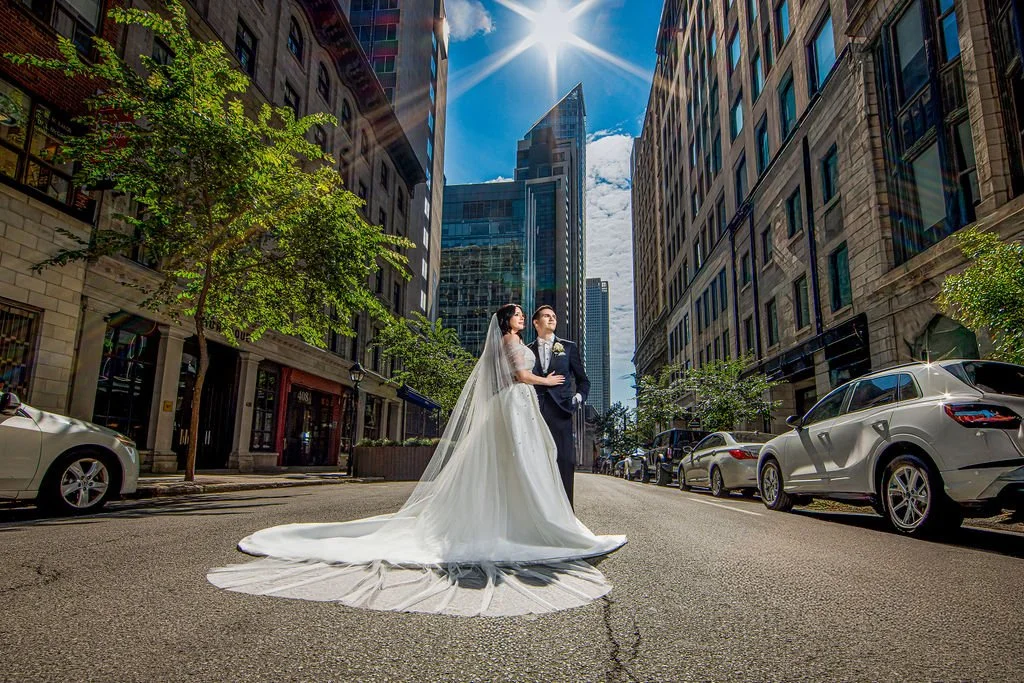
Picture of a real B&G downtown Montreal
Canon R5
Lens Canon 14mm
F16
SS 1/200
ISO 200

Picture of a real B&G downtown Montreal, in a real wedding day
Same settings as above
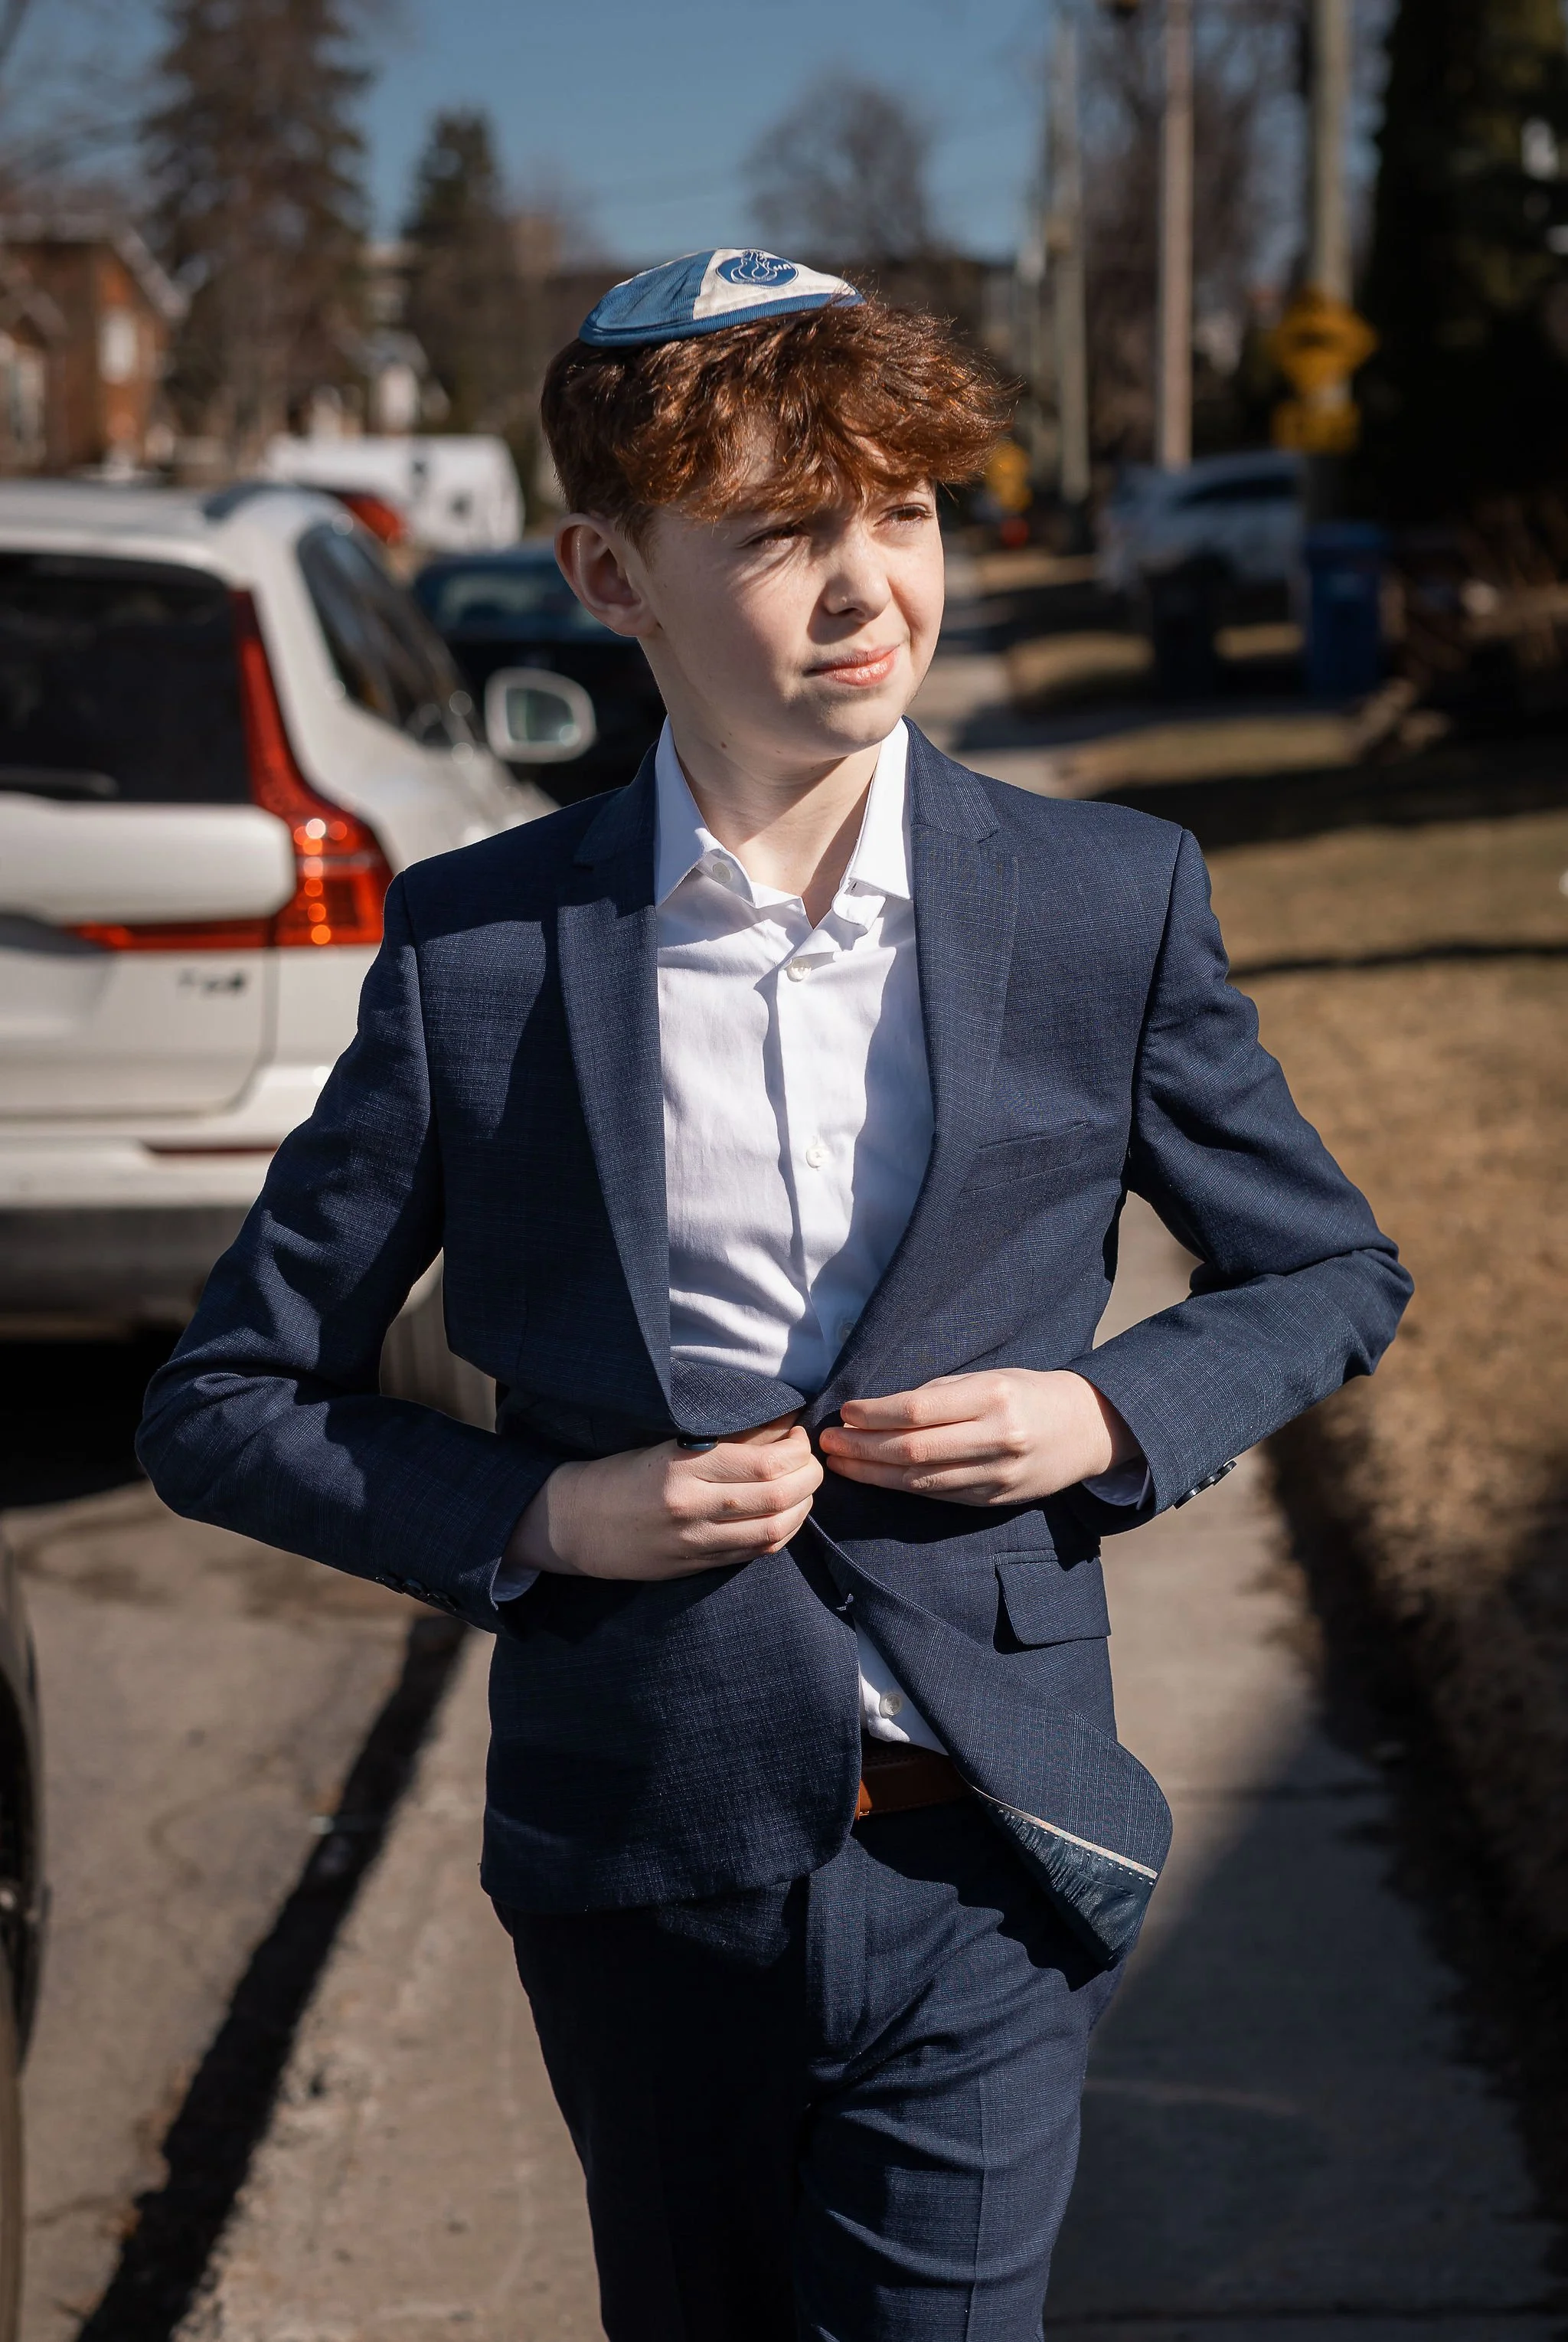
Bride & Groom on a real wedding day. Picture taken at 5:23
Canon R5
Canon 14mm lens EF
F18
SS 1/200
ISO 200

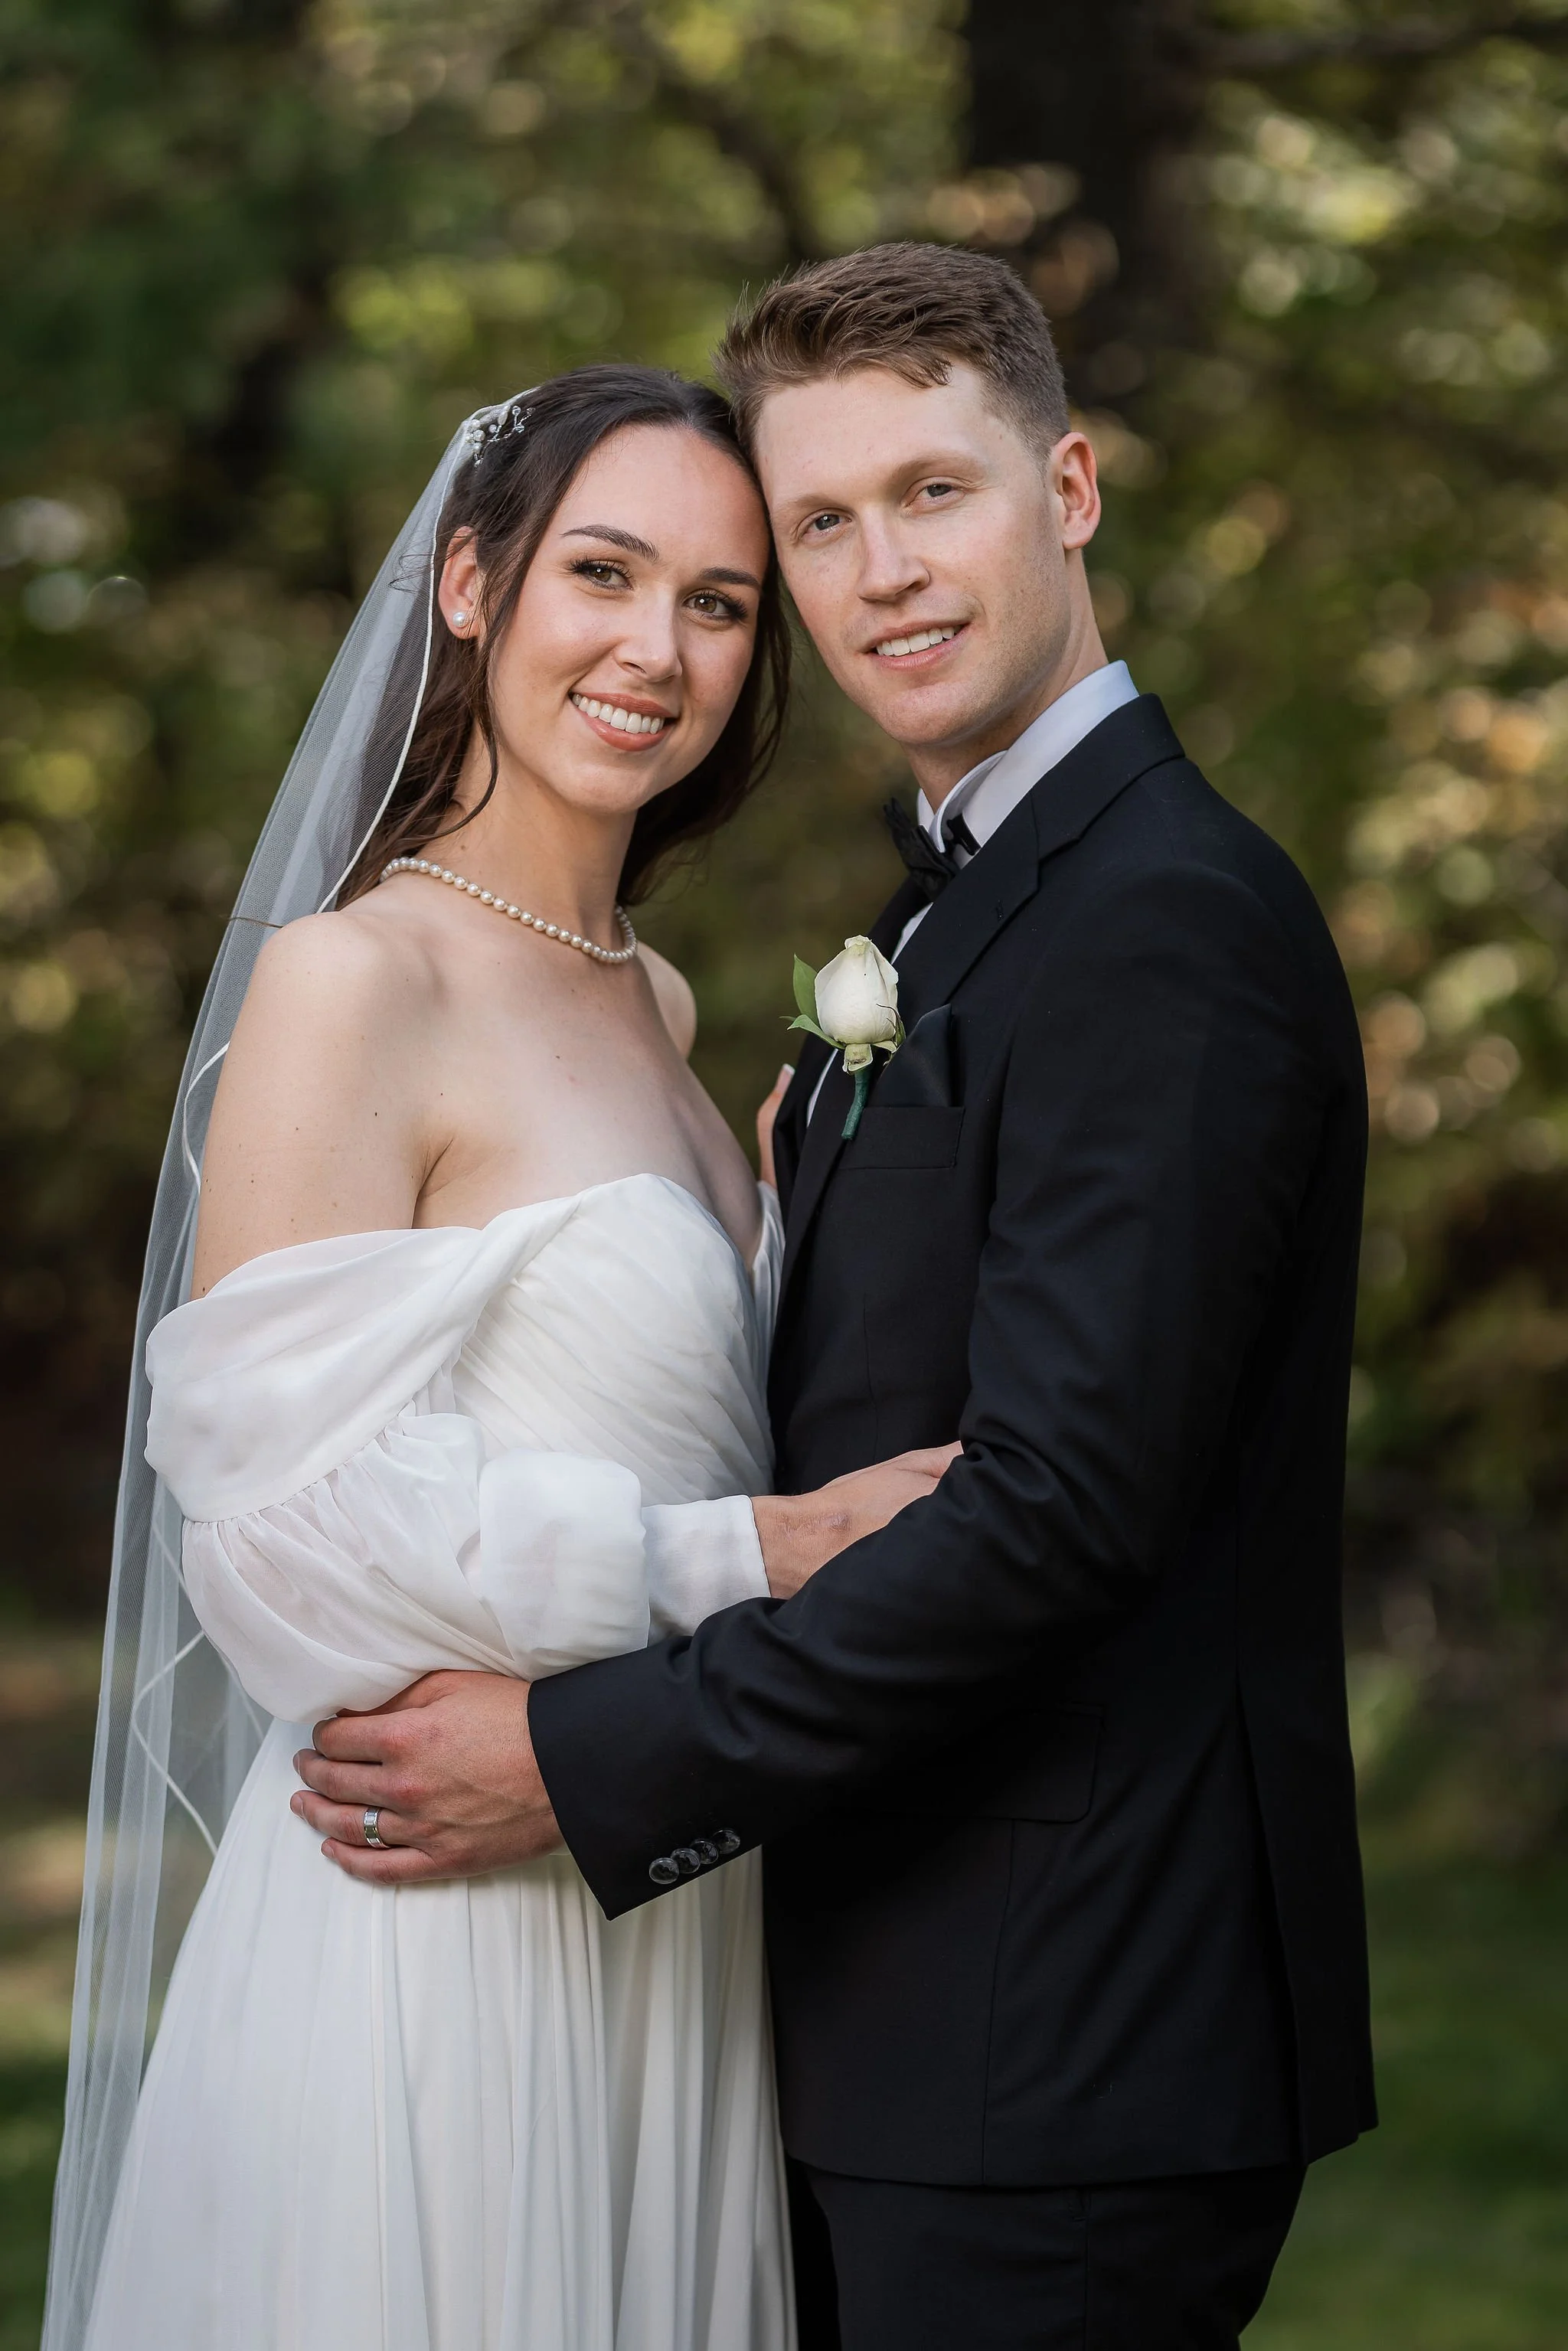
Real bride on her wedding day. Picture taken at 5:26
F16
SS 1/200
ISO 200
Me: Great question. Most photographers hate noon sun, but I see it as a canvas. For this shot, I started with the Sunny 16 rule: f/16, ISO 200, and 1/200 sec gave me the perfect base exposure for the background, the sky, the buildings, and that crisp sunburst overhead. It’s important to note that I only use these settings when I am using a wide angle lens. I want the subjects and the background to be visible, in focus AND have that dramatic and high contrast look throughout the frame. Once that was locked in, I added off-camera flash to bring the couple back into balance without losing the drama of the scene. In this case, camera right. In comes the frame, soon as balance between background and couple exposure is achieved. It’s a real wedding day, on crunch time, in the middle of a busy street, not a lot of time.
The buildings act as leading lines. The street is the middle of the frame, The buildings behind and the sky add depth to the image.
Equipment used:
Canon R5.
Lens Canon 14mm lens EF
Light used:
AD400 pro
34” quick octagon from Flashgear.net, in a C light Stand, camera right, about 8 feet hight, pointing down at the couple.
Aperture f/16: I wanted to expose for the background and capture that crisp sunstar effect. Smaller apertures like f/16 naturally create those starbursts, and it also gave me deep depth of field so the buildings, sky, and couple were all sharp.
Shutter speed 1/200: Since I was working with ISO 200, the Sunny 16 rule points me to 1/200 sec as the correct shutter for proper exposure in bright sunlight. It kept the ambient light balanced without blowing out the sky.
ISO 200: Normally I’d shoot at ISO 100, but bumping to 200 gave me a faster shutter option while still keeping noise negligible. It also matched perfectly with the Sunny 16 formula.
The 14mm was intentional because:Drama & Scale: A wide lens exaggerates the scene. It makes the buildings feel taller and the street more epic, turning a simple downtown block into a cinematic stage.
Storytelling: With a wedding portrait, I don’t just want the couple—I want the environment. The 14mm let me showcase the city, the sky, and the sunburst all in one frame.
Movement: It amplified the veil toss, stretching it across the frame like a brushstroke, which wouldn’t have had the same impact on a longer lens.
So the 14mm gave me the big, dramatic, environmental storytelling shot
With those base settings locked in, I added off-camera flash to lift the couple out of the shadows and match them to the environment. That’s what gives you the best of both worlds: the drama of the midday city and the couple perfectly lit in the middle of it.
Now, from a crisp f/16 urban sunburst to a soft, romantic f/2 portrait. Same couple, same street, same sun blazing in the sky. wider aperture for a nice blurred background
Q; Okay, Braulio, the first shot was dramatic with the sunburst and the whole city in focus. But this one feels so much softer, more intimate. What changed?”
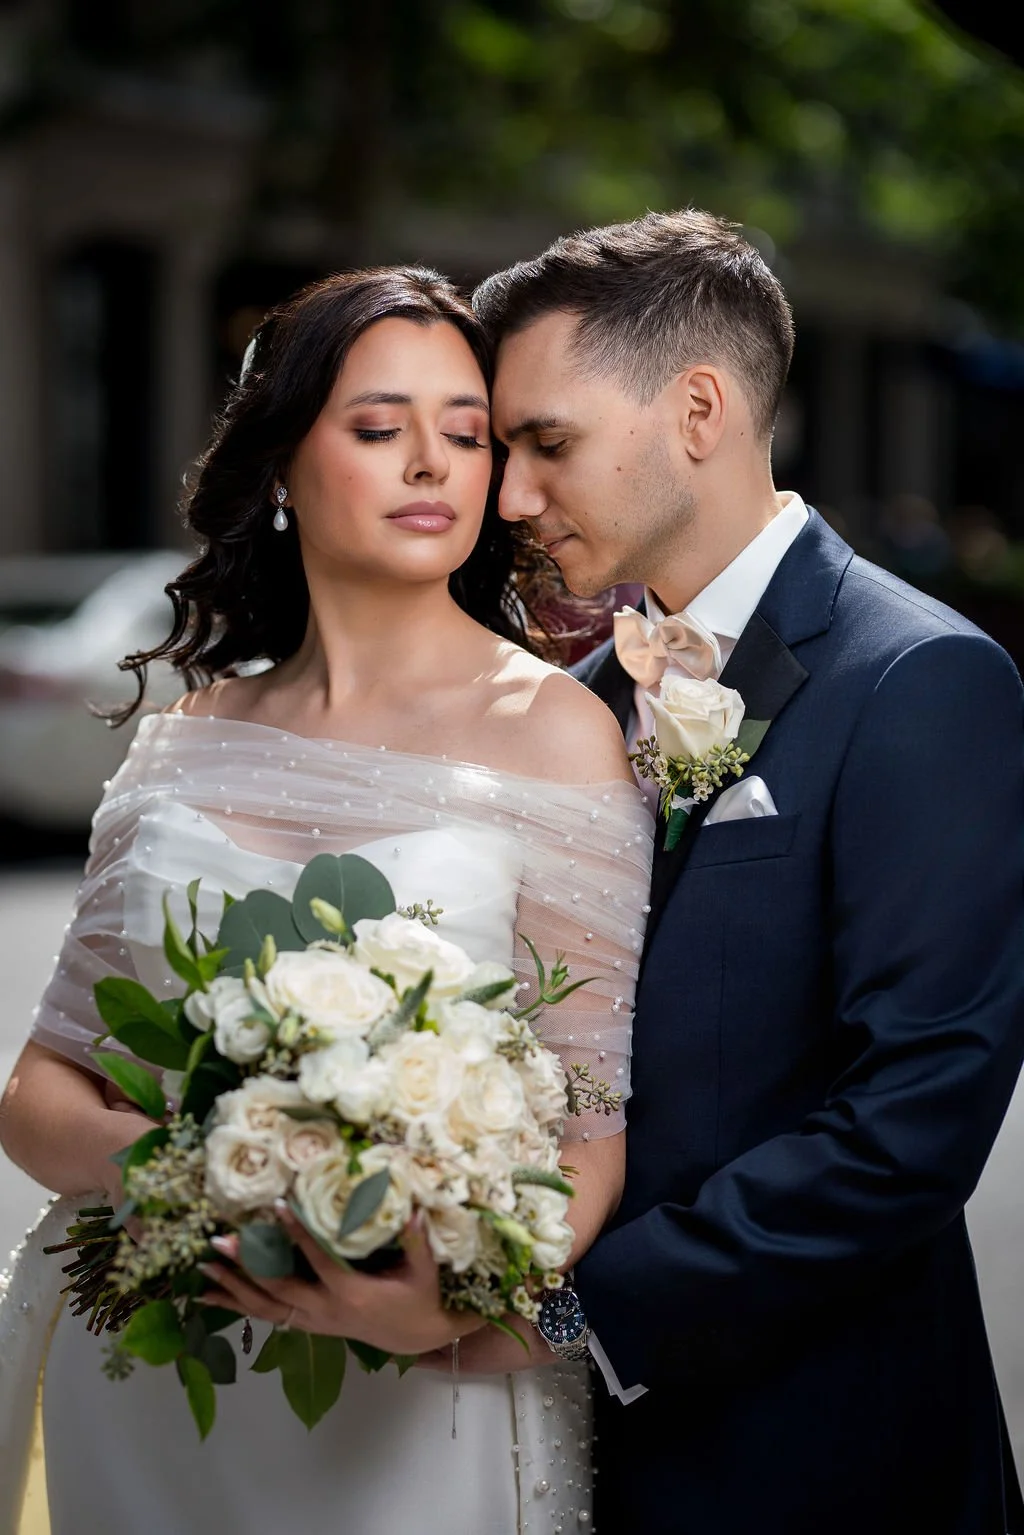
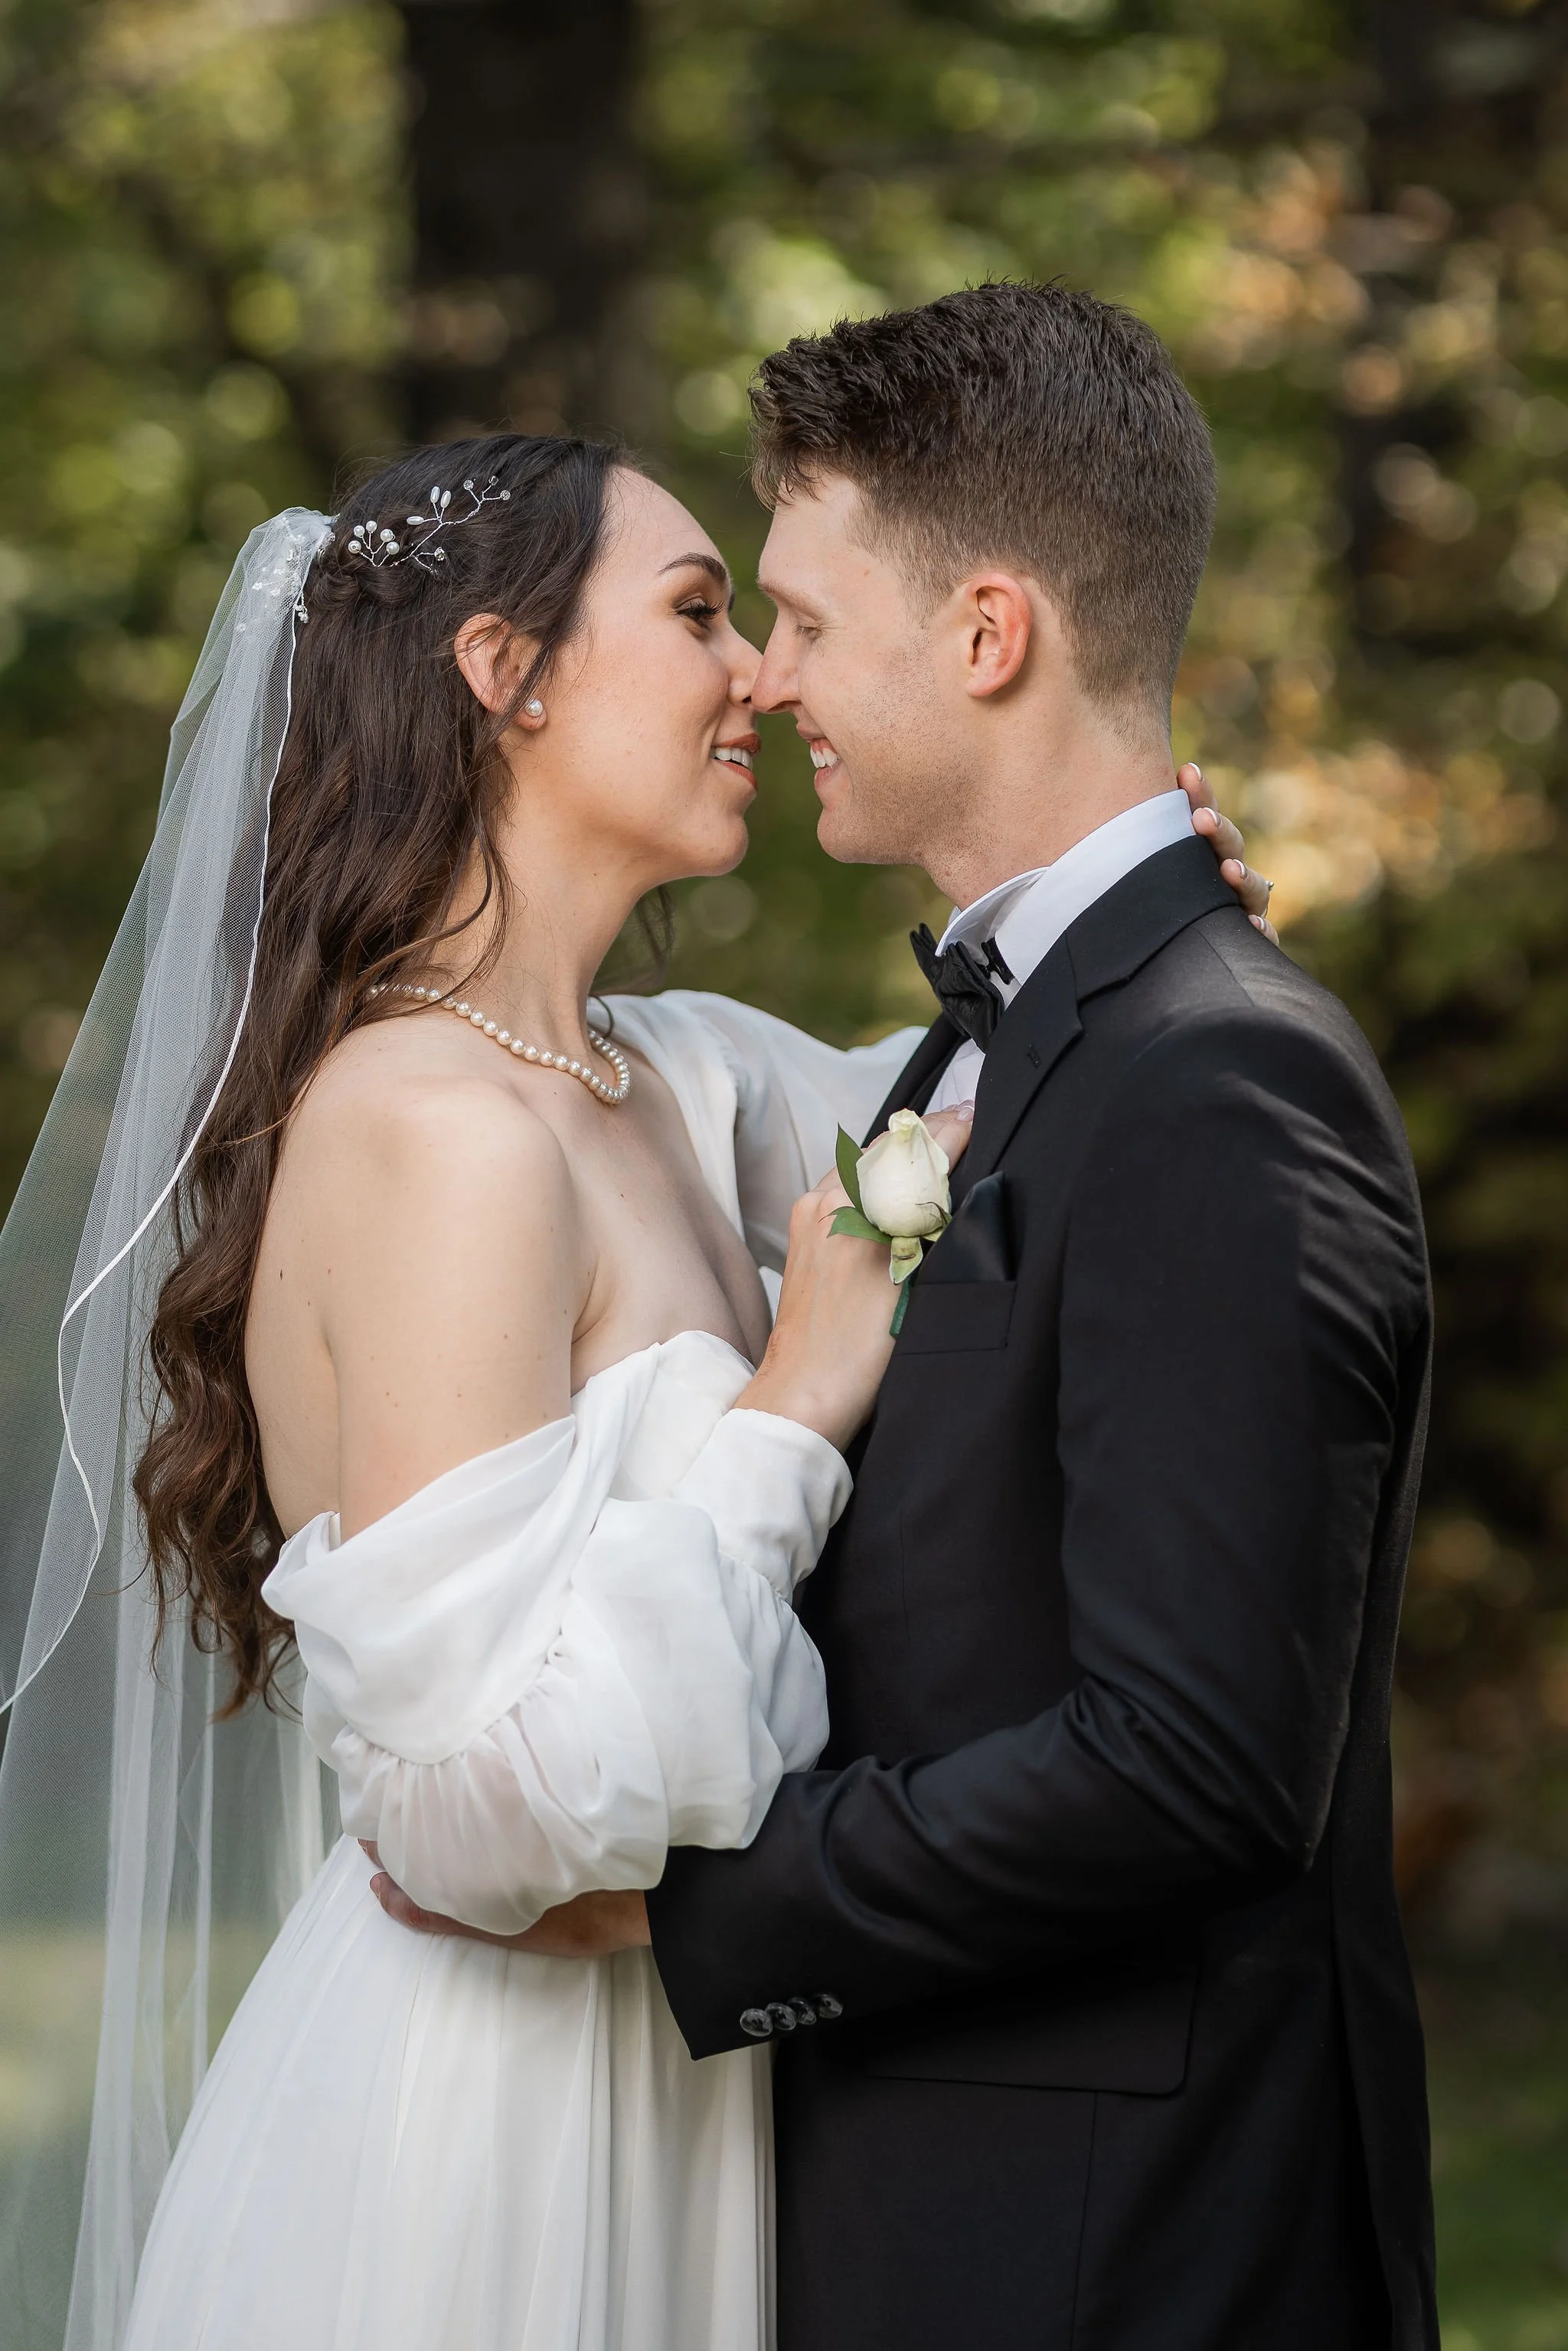
Real Bride & Groom on their wedding day. Picture taken at 1:40 pm
F2
SS 1/1000
ISO 50
Real Bride & Groom on their wedding day
Same settings as above
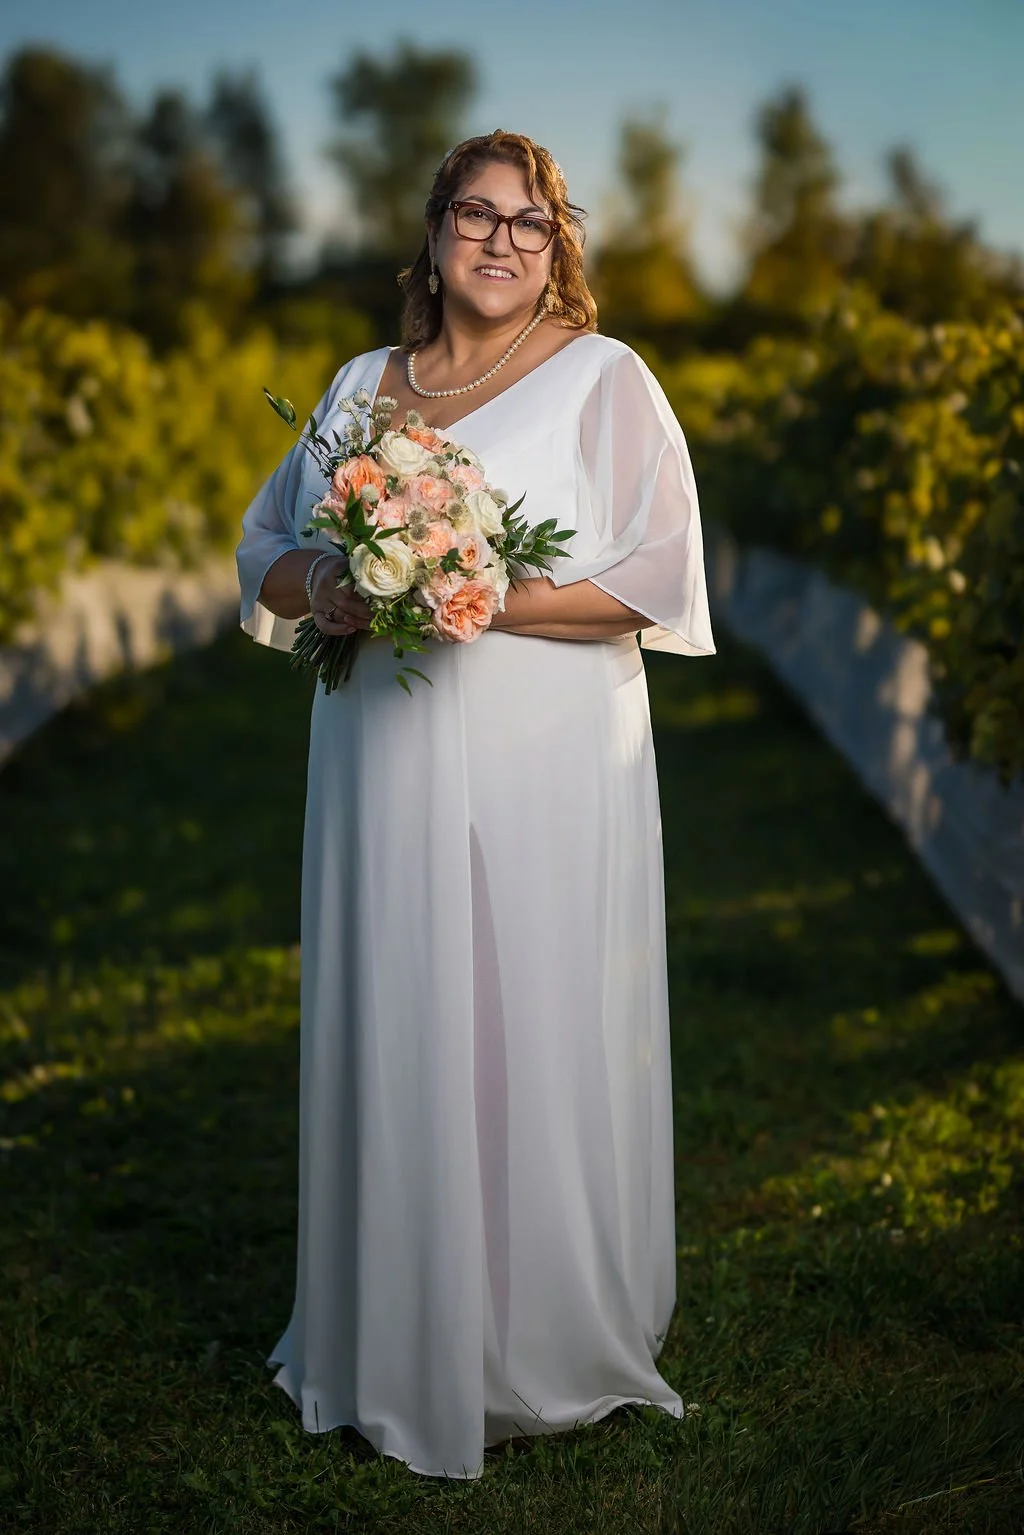
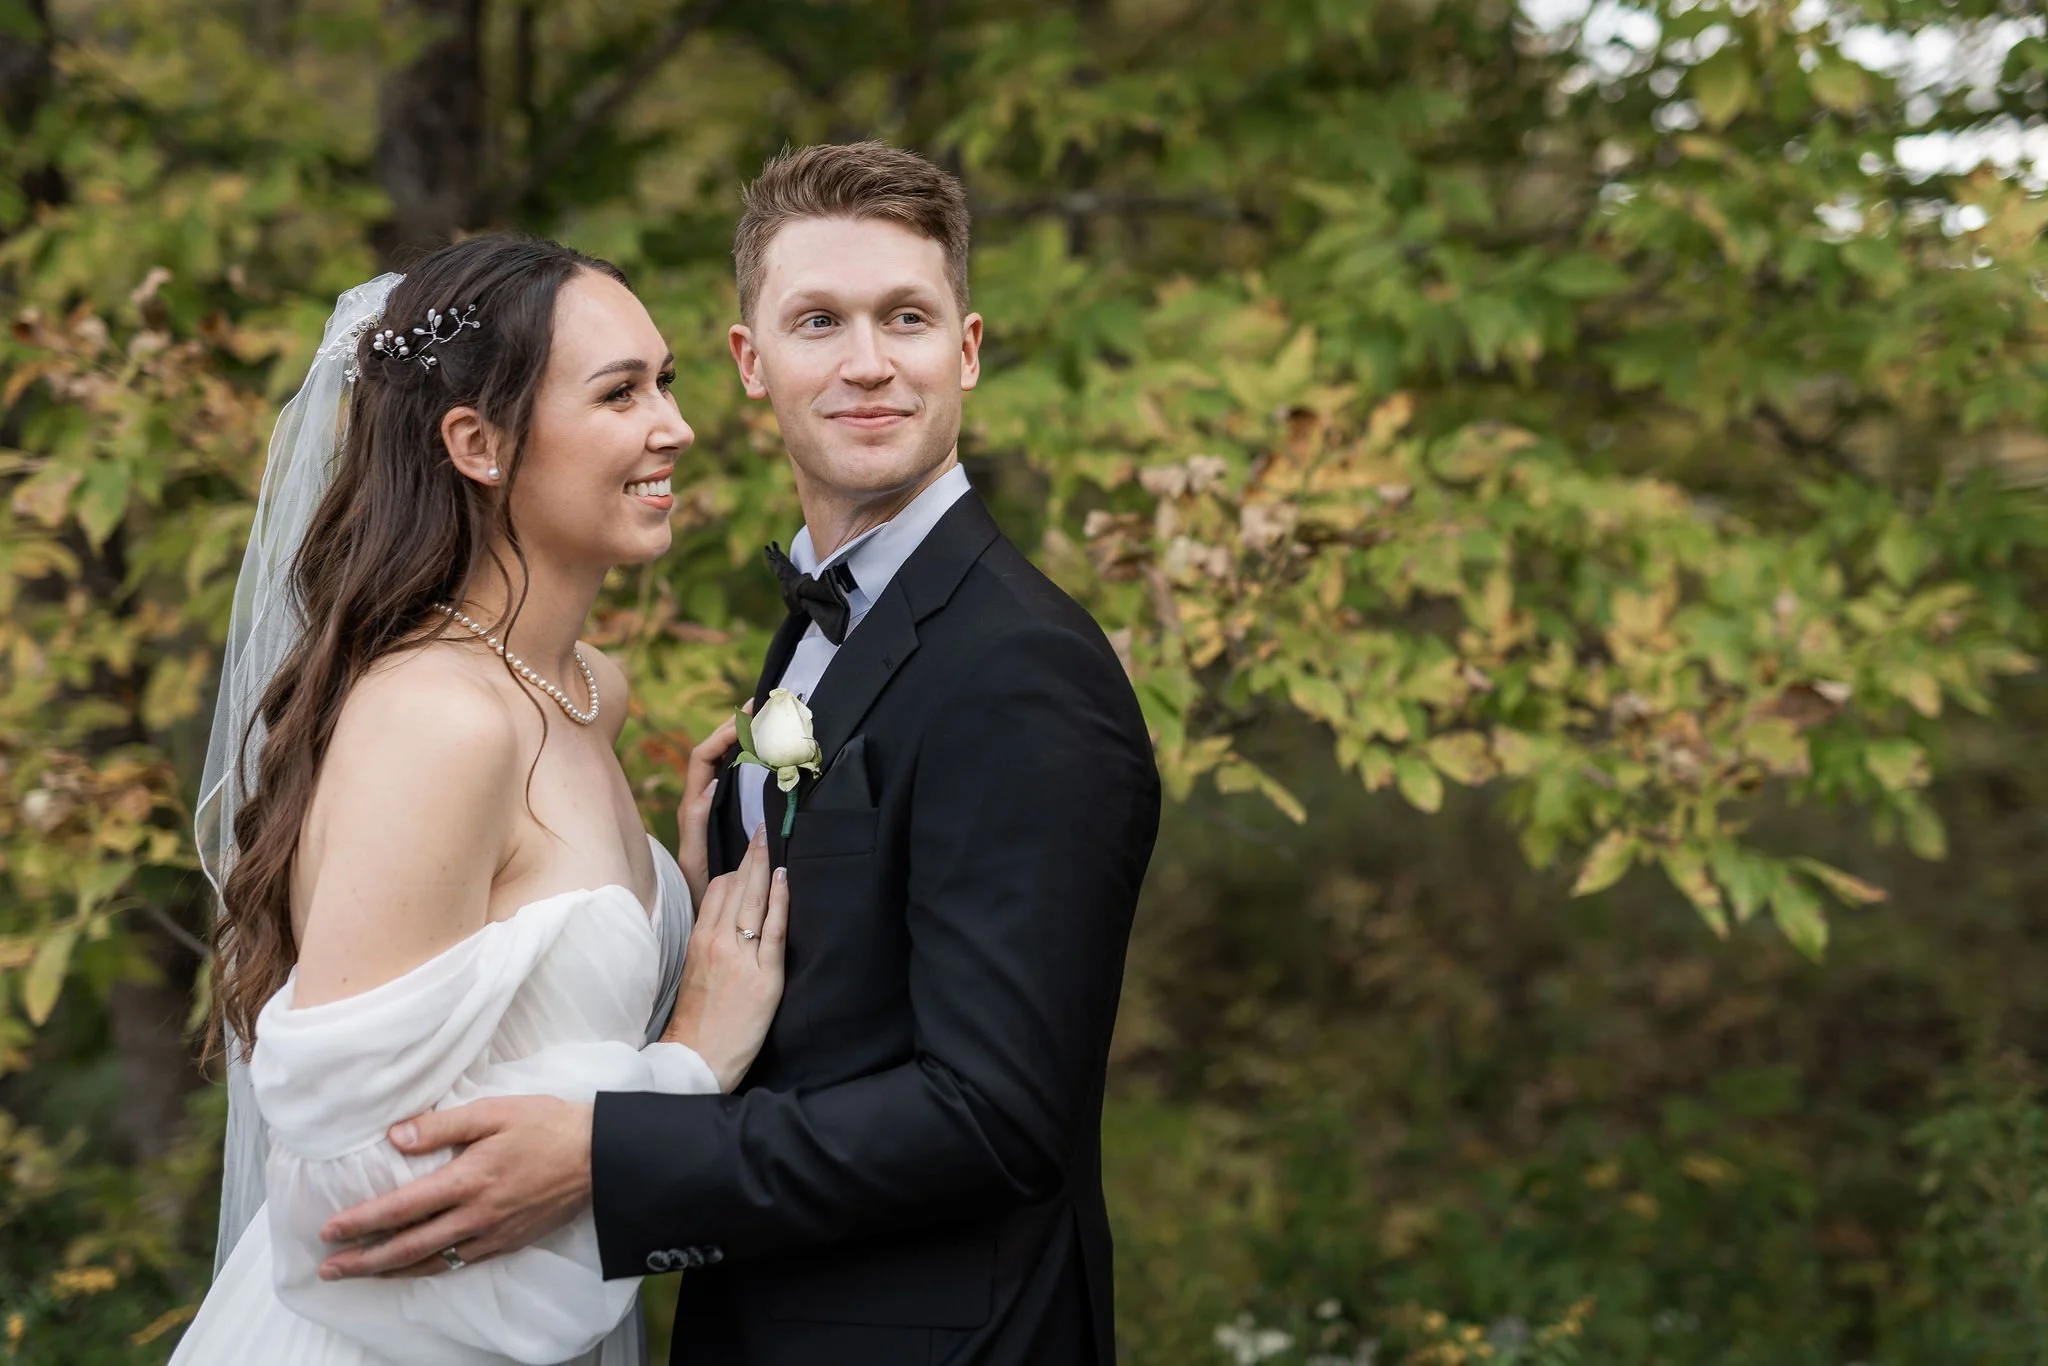
Real Bride on her wedding day. Picture taken at 5:41 pm
Canon R5
Lens Sigma Art 85mm lens
F2
SS 1/3200
ISO 100
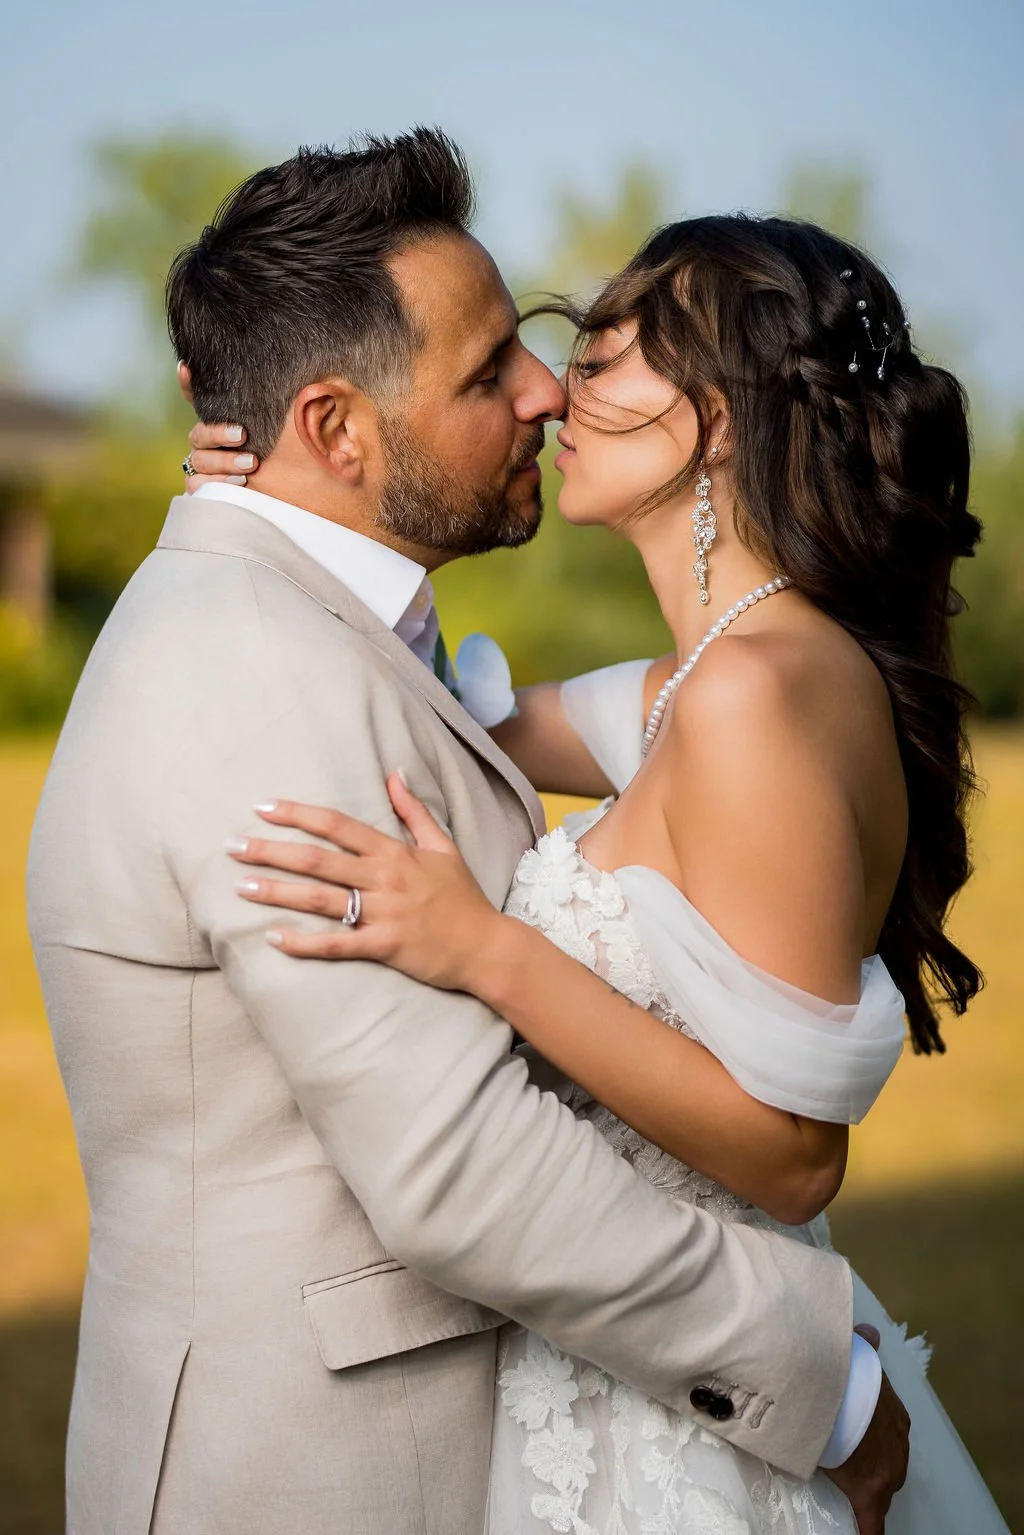
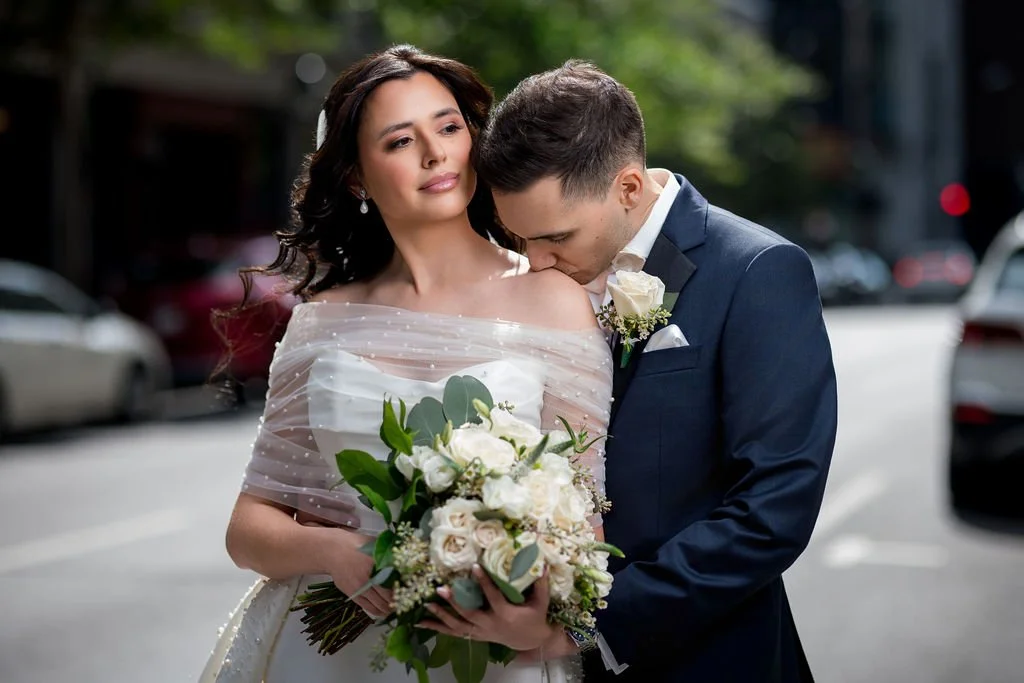
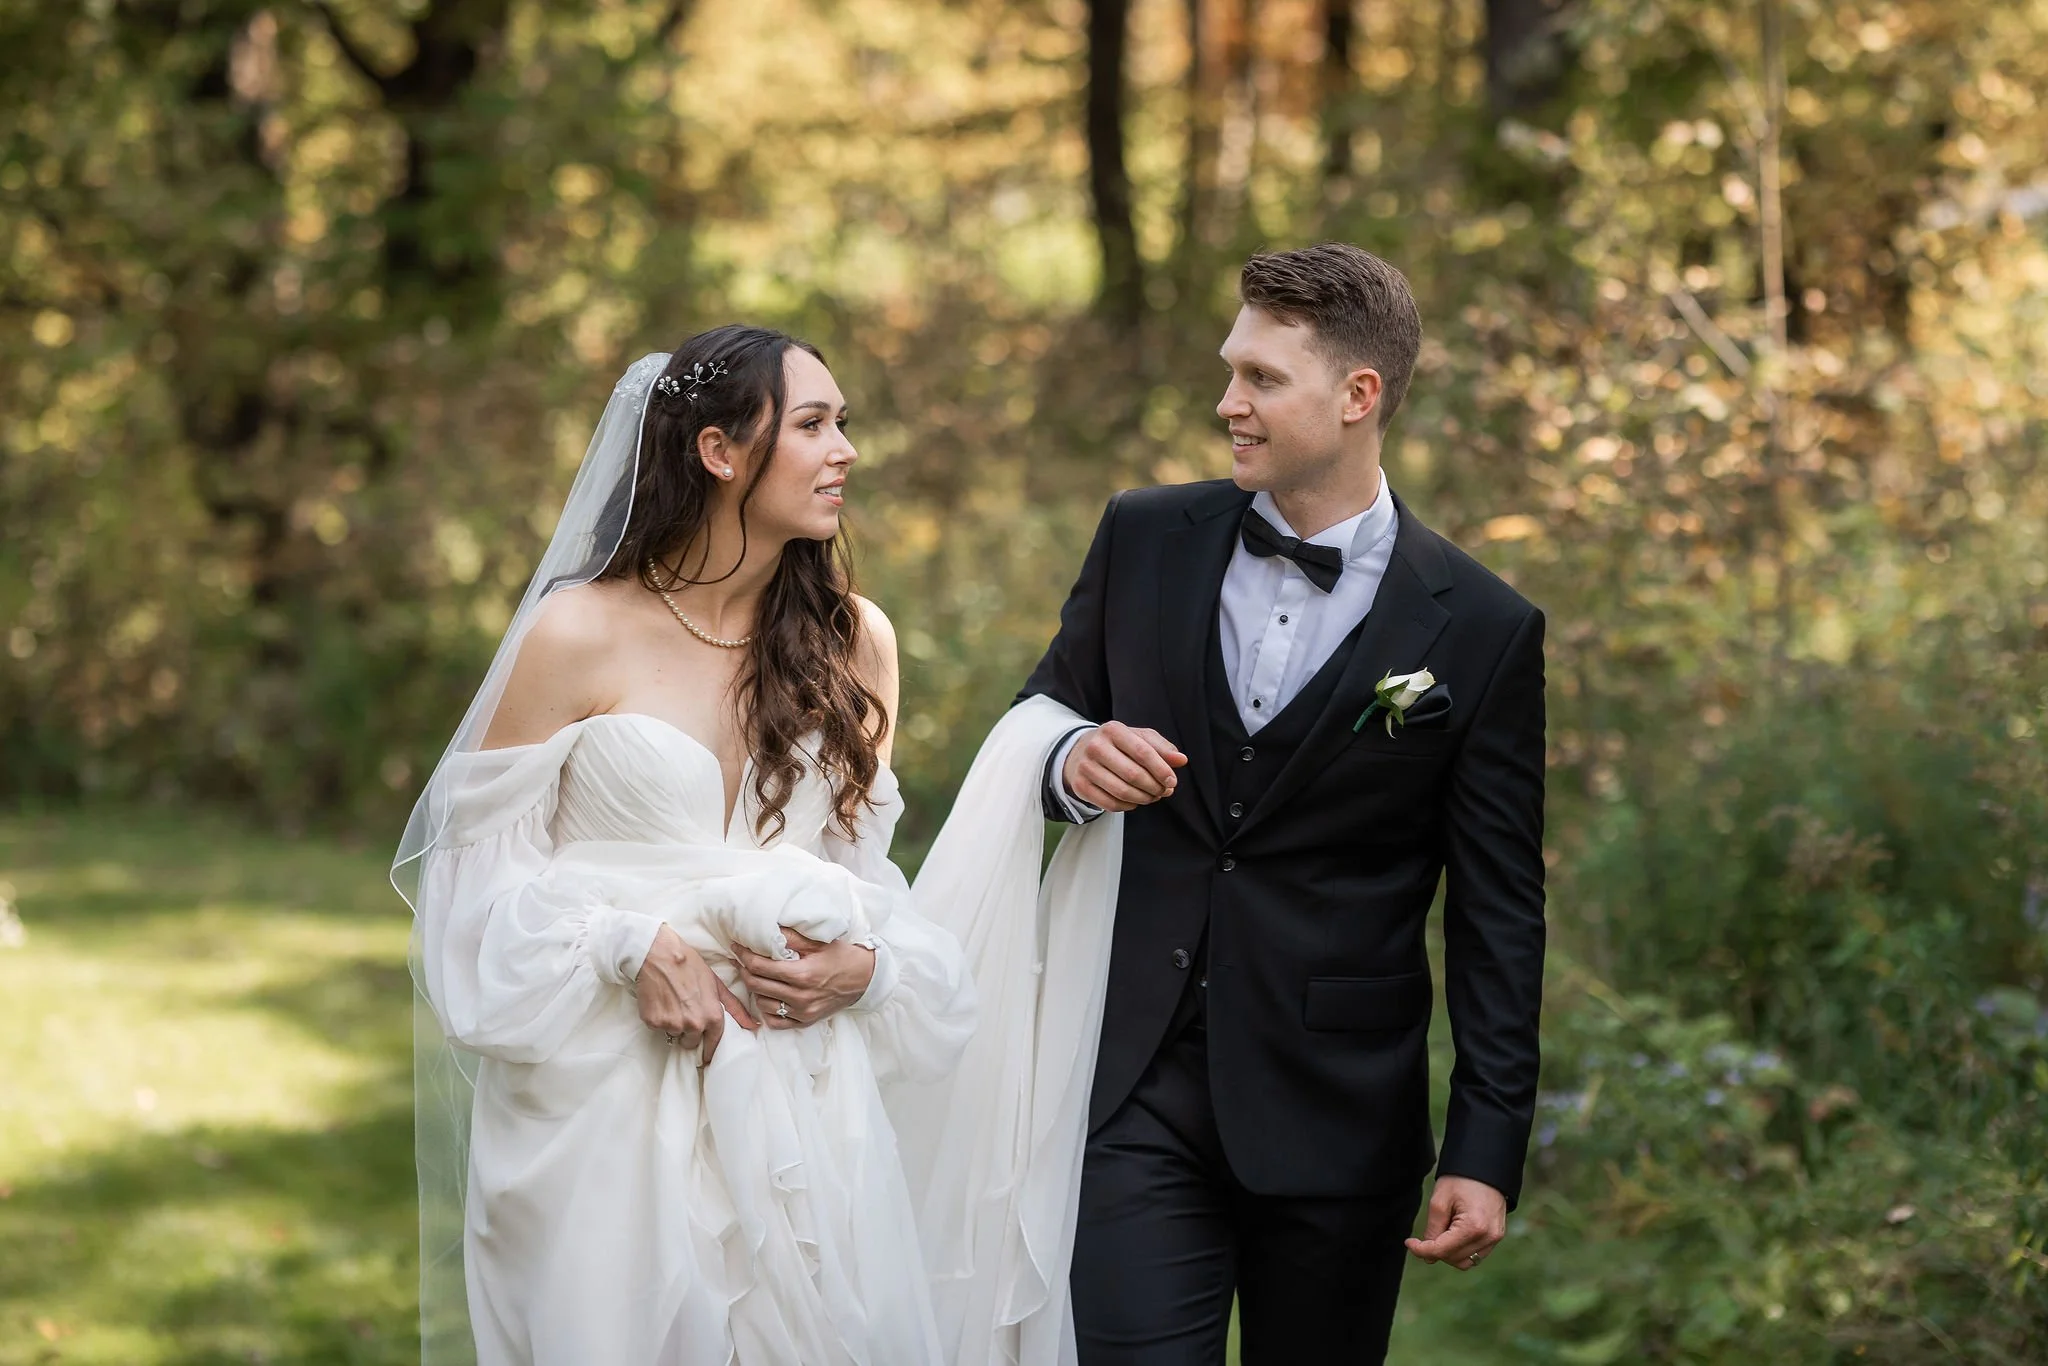
Picture of a real B&G on a real wedding day. Picture taken at 5:37
Canon R5
Lens Sigma Art 85mm lens
F2
SS 1/5000
ISO 100
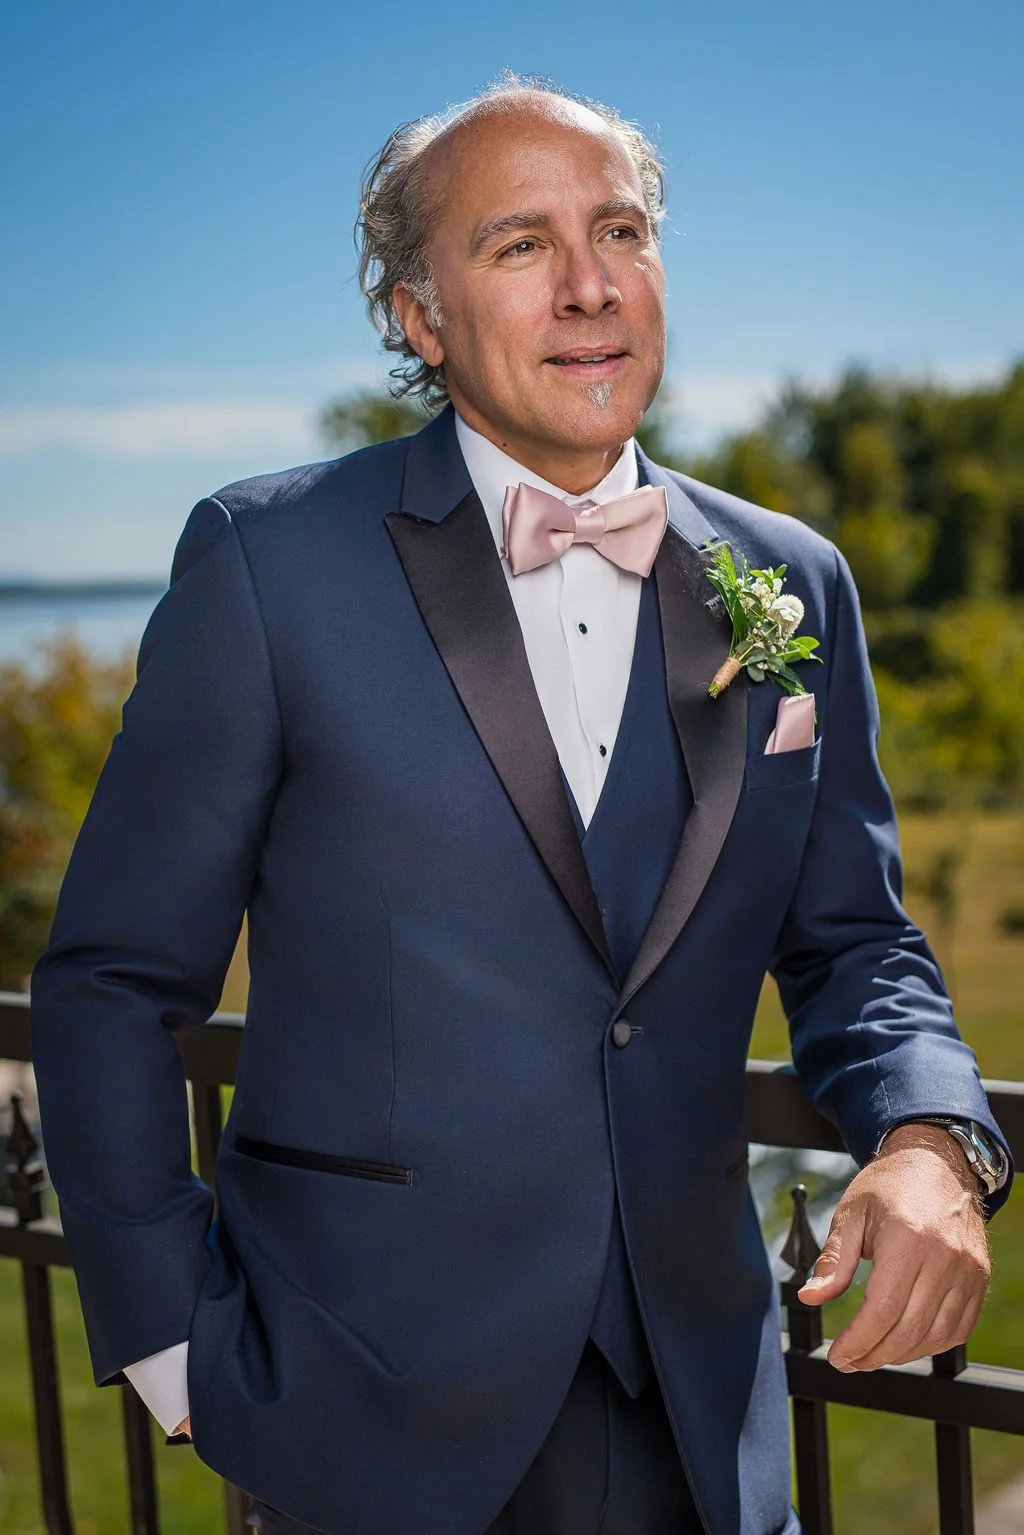
Picture of a real groom on his wedding day. Picture taken at 2:21 pm
Canon R5
Lens Sigma Art 85mm
F2
SS 1/2000
ISO 100
Me: Exactly. Different mood, different tools. Here I wanted to blur the background and make the couple stand out, so I opened up my aperture to f/2. I also changed the lens. From a 14mm lens to a 85mm lens. That shallow depth of field melts the cars and city details away, keeping all the attention on them. My settings were f/2, 1/1000 sec, ISO 50. The fast shutter kept the image sharp in bright light, while ISO 50 gave me cleaner tones and let me shoot wide open. The result is a tighter, more romantic crop that feels timeless compared to the dramatic wide shot from before.
Aperture f/2: I wanted a shallow depth of field so the background would blur away. At f/2, the couple stays sharp, but everything behind them melts into softness, perfect for an intimate, romantic feel.
Shutter speed 1/1000: With such a wide aperture in bright daylight, I needed a fast shutter to avoid blowing out the highlights. 1/1000 sec kept the exposure balanced and the image tack sharp.
ISO 50: Normally I’d be at ISO 100, but dropping to ISO 50 gave me a little extra control. It let me stay wide open at f/2 without overexposing, and it kept the tones super clean and smooth.
The 85mm is my go-to lens for portraits because:Compression: It naturally compresses the background, making it look closer and creamier. That works beautifully with f/2 to really melt distractions away.
Flattering perspective: The 85mm keeps facial features natural and elegant—no distortion like you might get at wider focal lengths.
Isolation: Paired with a wide aperture, it gives incredible subject separation. The couple stands out crystal clear while the city falls into soft blur.
In short, the 85mm gave me that intimate, cinematic portrait look that feels timeless—perfect for balancing out the big, dramatic wide shot we did earlier.
So every setting had a purpose: shallow depth of field for mood, fast shutter for control, and low ISO for quality. Together, they created this soft, elegant look that complements the couple’s moment.
Posing & Light Placement
Before you even pose your couple, you need the right light. In bright conditions like these, your flash has to be powerful enough to compete with the sun—400 watts and up will usually do the job.
Modifiers That Work
Go with something that wraps light beautifully while still giving direction:
A beauty dish for punch and shape.
A softbox for smoother wrap.
Or a hybrid like the Flashgear 34" beauty dish/quick octabox, which combines both qualities.
Where to Place the Light
General rule: Always place the light to the side of your position—either left or right. This creates dimension and avoids flat lighting.
With a wide lens (like 14mm): Keep the light further away from your subjects. This gives a punchier, contrasty look, but it means you’ll need more power. Keep it just outside the frame (or barely visible for easy Photoshop cleanup).
For softer light: Move the light as close as possible to your subjects. The closer the source, the softer the falloff, and the less power you’ll need. You can even feather the light (angling it slightly past your subjects) for a smoother, more even wrap.
Posing With Light in Mind
Once the light is set, pose your couple so their faces naturally turn toward the light. This makes the light work for them instead of against them, giving you beautiful highlights and shadows that sculpt their features.
Your pose will only look as good as the way the light hits your couple. The rule of thumb I follow is simple:
Wide angle images: Have their faces toward the light. With a wide lens, you’re often working with a punchier setup and higher contrast. That means shadows will fall harder behind them—but that’s the point. It creates drama and separation. The key is making sure those shadows don’t fall in the wrong places—under the eyes, nose, or neck. Keep those areas clean, and the rest of the scene can handle the contrast.
Close-up portraits: Here, I prefer the nose pointing toward the key light. Even if you’re using a soft modifier, if the face turns too far away from the light, the shadow side becomes too harsh, which feels unflattering in tighter frames. By pointing the nose toward the key light, you get a smooth transition from highlight to shadow, adding depth and dimension without losing softness.
Think of it this way: wide shots thrive on contrast, close-ups thrive on smooth transitions.
Reflections:
At the end of the day, every image in this breakdown had the same starting point: light is light. Whether I’m shooting with a wide 14mm lens at f/16 under harsh midday sun, or an 85mm portrait at f/2 with a blurred background, the process never changes—I read the light, I decide how I want the image to feel, and then I use my tools to make it happen.
What I hope you take from this is that there’s no such thing as “bad light.” Harsh sun, soft shade, golden hour, or flash—it’s all just light, waiting for you to shape it. The Sunny 16 rule, lens choice, off-camera flash, posing toward the key—these aren’t tricks, they’re fundamentals. Master them, and you’ll never panic in difficult conditions again.
So the next time you step into a wedding day and the light isn’t “perfect,” remember: it doesn’t need to be. Light is light—what you do with it is what makes the photograph.
On my next blog, we will dive into my process of lighting couples indoors, in the absence of Natural light. What happens if it rains and you have to go inside? And there’s no interesting place for you to take beautiful portraits for your couple? Or, if you have to shoot after sunset, with zero natural light available?
Stay tuned.

Light is light, series, ep 02: Natural light, The good, the bad, the ugly.
Natural light is the oldest ink in photography. Master it, and you’ll unlock the confidence to face any light, sun, shade, or flash, and write stories only you can tell.

Light is Light series, EP 01: But why Off Camera Flash tho?
Photography isn’t just pressing a button. It’s writing with light. Master off-camera flash, and you’ll never run out of ink.

How I Created a Cinematic Wedding Portrait that sells ,in Harsh Sunligh.
How to master posing, light, and flash for stunning wedding portraits under pressure.

VIDEO- How I Photograph a Bride on a Real Wedding Day
Forget styled shoots and perfect conditions. This is real wedding photography, tight timelines, harsh light, and no second chances. In this post, I walk you through exactly how I photograph a bride on a real wedding day, from posing to lighting to fast gear switches, all under pressure.

20 Scroll-Stopping Hooks for Event and Portrait Photographers
If your captions still sound like “Such a beautiful day with this lovely couple,” you’re doing it wrong. Your photos might be fire, but if your words don’t punch, no one’s stopping to care. These 20 hooks aren’t cute, they’re weapons. Use them to slice through the noise, grab attention by the throat, and make your work impossible to ignore. Ready to stop blending in? Good. Let’s go.

What’s Actually Working in Photography Marketing (and How to Use It Without Wasting Time)
Most photographers are out here hoping pretty pictures will get them booked. Meanwhile, the ones killing it are using emotional reels, smart blogging, and vendor networking like weapons. This blog breaks it all down, no fluff, just straight-up strategies you can steal and make your own.

Chapter 3: How I Became the Photographer Everyone in the Community Knew
Before the bookings… before the Bar Mitzvahs… I was scrubbing toilets. Then one day, still in my janitor uniform, I knocked on the synagogue director’s door and made a $50 offer that changed my life. No ads. No planners. Just grit, hustle, and straight-up initiative. This is how I went from invisible to booked solid — and what you better learn from it.
NO REFERRALS. NO ADS. JUST INITIATIVE AND A CAMERA.
You want the truth?
You want the real story?
Not that Instagram-filtered “how I found my passion” fairy dust. I mean the real grind.
Cool. Buckle up.
Because I didn’t start in a studio with natural light and plants hanging from the ceiling.
I started in a goddamn janitor closet.
And I didn’t get discovered. I dared someone to notice me. This is how I truly went from a 11$ hour janitor, to the New York Times calling me “Montreal’s Bar Mitzvah photography king”.
THE PITCH (STILL SMELLING LIKE BLEACH)
I had just finished scrubbing piss off a toilet seat when I marched my tired ass down the hallway of the richest synagogue in the country. Janitor uniform still on. No shame.
Knocked on the director’s door like I owned the place.
He looked up.
I said:
“Let me shoot all your events, every single one. Purim, Hanukah, concerts, whatever. $50 flat. Whether it’s 30 minutes or 4 hours, I’ll be there. Period.”
He blinked. I stood there like a statue with a camera-shaped dream and bleach still on my shoes. What’s the worst thing that could happen? Him saying no? Hell, if there’s one thing I now, is that if you don’t ask, the answer is always no.
And somehow, he said yes. He. Fucking. Said. Yes.
But I wasn’t done.
That same building had two schools.
So I hit up the directors and made the same pitch. Same energy. Same price. Same janitor uniform. Let me say it again for the photographers in the back: same damn uniform.
They said yes too.
WELCOME TO THE LOOP: SHOOT, CLEAN, REPEAT
This is where most people fold. Where the dream dies because “it’s hard” or “not sustainable.” Hell, if it was easy, everybody would do it right? I am one of the few. Snd if you stick with me, so will you.
I cleaned for 8 hours a day. Then I changed shirts, picked up my camera, and photographed events into the night.
Kids’ concerts. Conferences. Candle lighting. Clown shows. Torahs and tambourines.
Then came back the next morning to clean up the juice spills from the party I just shot.
You ever mop the floor under your own tripod marks? I have. And I did it with pride. Still sucked tho.
No ego.
No whining.
Just mission: get seen, get booked, or die trying. Repeat. I’ll sleep when I die.
THE BUSINESS CARD GRAVEYARD
Every event, I handed out business cards like I was Oprah giving out cars.
“You get a card. You get a card. You too, here’s my card”
Did most of them end up in trash bins? Hell yeah.
Did I care? Absolutely not.
I wasn’t looking for everyone.
I was looking for one.
One parent to see me.
One person to keep the card.
One call that could crack the door open.
Seven. Freakin’. Months.
Seven months of showing up, handing out cards, getting nothing.
Then my phone rang.
And the parent on the other end said something I’ll never forget:
“I’m planning my son’s Bar Mitzvah”
Boom. All that showing up repeatedly in every event, finally paid off.
And after that the occasional birthday party, sweet 16, family session. But nothing big enough yet to really make me stand out. And then it happened.
THE BIG ONE: GRADE SIX OR GO HOME
A year and a half in, I got a call from one of the schools.
They were planning a graduation for the Grade Six class. 48 kids.
And if you know, you know: Grade Six = Bar Mitzvah breeding ground.
This wasn’t a job.
This was warfare.
A six-hour event.
One portrait of each kid.
One DVD delivered to every single parent.
That’s 48 DVDs for those counting, and yes, I burned them myself like it was 2003 and I was bootlegging Jay-Z albums.
I charged $1,000. Which was stupid cheap.
But I wasn’t thinking about profit. I was thinking about positioning.
That night, I was everywhere.
Fast.
Funny.
Loud.
Directing parents. Hyping kids. Telling jokes. Working like I was auditioning for SNL with a camera in one hand and a lightstand in the other. I was an Apex predator and that was my hunting ground.
I wasn’t just shooting. I was owning the damn room.
Out of those 48 kids?
I booked TWENTY Bar Mitzvahs.
TWENTY.
No Instagram ads.
No planner referrals.
No influencer shout-outs.
Just hustle, personality, and a reputation I built with my bare hands.
AND THEN I SAID…
And that, my friends, is how I climbed the damn mountain,
planted a flag with my name on it,
and yelled:
“This bitch is mine now.”
WHAT YOU BETTER LEARN FROM THIS
1. Get in the Room, Even if You’re Mopping It First
You can’t win the game if you’re not even on the field. Be around people. Proximity creates opportunity. Knock on doors. If those doors don’t open, try again tomorrow. Quitting isn’t an option.
2. Stop Waiting for Perfect. Start Doing Shit.
No one cares about your logo or your website font when you are starting. Take the gig. Build the rep. Refine later.
3. Play the Long Game
Seven months before one call. You willing to play that long? Or you quitting after two weeks of crickets? Look yourself in the mirror and ask yourself that question. Every single day.
4. Every Event Is an Audition
I didn’t shoot like it was “just a school event.” I shot like Spielberg was watching. in this case, 48 Spielbergs and three families.
5. Be Unforgettable
You don’t need to be the best. Be the one they remember. Make a mark. Create an impression. Be “the one”. don’t be afraid to “be special”
Final Word
You say you want to make it in photography?
Cool.
But don’t talk to me about gear, or presets, or Instagram reach, until you’ve handed out 200 business cards and picked your soul back up off the floor after the 199th gets ignored.
Hustle isn’t cute.
But it works.
Now get back to work. Because this?
This is the Braulio Way. And if I made it, why can’t you? What’s stopping you?
– Braulio Rocha
The Braulio Way™
Along the way, I made many mistakes that cost me years and money. Not everything was pretty. In my next chapter I will talk about things you should do (That I didn’t, out of ignorance) so that your journey isn’t as hard as mine was. It really doesn’t have to be. We will dive more into marketing and the business of event photography, and how you make real money in a shorter amount of time, than me. Stay tuned, and as always, don’t forget to drop a follow on my instagram for its reels, as well as subscribe (free) to my YouTube channel. Links below.
Instagram- www.instagram.com/rochastudio
Youtube- https://youtube.com/@thebraulioway?si=sfPVOylgY2244dZX

How a Missed Photographer Opened My Destiny
I was mopping floors in a synagogue when the photographer didn’t show up. In that moment, I stepped out of the shadows, grabbed my old camera, and said yes. This is the story of how I went from janitor to photographer, in the middle of a Brit Milah, with nothing but faith, grit, and a Canon Rebel in my trunk.

Chapter 2 – From Mop to photographer: How God Trained Me in Silence
Before I ever held a camera, I held a mop.
In the quiet halls of Canada’s largest synagogue, scrubbing floors and serving strangers, I learned the lessons that no classroom, no book, and no photo workshop could ever teach me. This is the story of how the Almighty prepared me for purpose—through exhaustion, silence, and a divine dance between light and shadow.

From Janitor to the pages of the New York Times. How it all started, Chapter one
From Janitor to Six-Figure Photographer: How Hustle, Grit, and a Chance Encounter Changed Everything
Before I picked up a camera, I was hustling tourists on the streets of Madeira, chasing tips and survival. This blog dives deep into the raw story of how I went from cleaning toilets to building one of Montreal’s most recognized photography brands. No fluff—just the truth, the struggle, and the mindset it takes to build something from nothing. Whether you're a photographer, entrepreneur, or just someone trying to escape the 9–5, this is the real blueprint.

Soft Light is Safe. Harsh Light is Legendary.
Want your portraits to look like they belong in a movie?
This blog breaks down how to use harsh, high-contrast lighting to create dramatic, cinematic images that command attention. From snoots to grids and tight flash control, learn how to sculpt with light, not just expose a scene.

Why Your Photos Still Look Flat: Mastering Soft Light Like a Pro
Soft light isn’t just about making your photos look pretty — it’s the difference between looking like a weekend warrior and a full-blown pro.
In this post, I’ll show you how to use size, distance, and diffusion to make your light wrap, glow, and flatter like it was handcrafted by the gods of portraiture themselves.
If your light still looks harsh, cheap, or flat… this is your wake-up call.
So you finally figured out how to expose your couple under the sun.
You dialed in your background. You added flash. You got the shot.
Congrats… you’ve graduated from “survivor” to “basic operator.”
But now I have a question for you — and be honest:
Did you control how that light feels?
Or did you just blast them with whatever light your strobe vomited out?
Because there’s a massive difference between a soft, elegant wrap-around glow that makes your subjects look like magazine covers...
And harsh, contrasty, unflattering light that screams, “I have no idea what modifiers do.”
Heres the thing tho. There is a time and a place for everything. And when well done, harsh light can produce amazing results.
In this two part blog series, we will break both down to you in a simple to read and understand way, so that you can make informed decisions when its your turn to lit up your subjects.
Today, we will focus on soft light.
What Is “Soft Light” vs. “Hard Light”?
Let me break it down for you, because this right here is where photographers separate from flash monkeys.
It’s not about having light.
It’s about shaping it.
Controlling it.
Making it feel intentional.
Soft Light = Flattering, Forgiving, Feels Like a Hug
Soft light wraps around your subject.
It melts shadows. It smooths skin. It’s elegant, romantic, and cinematic.
Think of soft light as the gentle voice in your lighting vocabulary — the one that says:
“Hey, I got you. Let’s make you look your best.”
Its image where you can see the my 34” diffuser really close to the subjects
You get it by using:
big light source (like a 36" or 48" softbox)
Bringing the light closer to your subject
Using diffusion (softbox, umbrella, scrim)
What you end up with:
Smooth transitions between light and shadow
Catchlights in the eyes that look alive and controlled
Skin that doesn’t scream “help me” in post
Confused? Lets break this down one by one.
Why Closer + Bigger = Softer: The Real Reason Your Light Still Looks Like TrashLet’s cut to the chase.
You bought the big-ass softbox. You set up your flash. You expected creamy, glowy, magazine-cover light…
And your image still looks like it was lit with a flashlight and regret.Why?
Because you placed the light too damn far from your subject. Which is a common mistake.
Here’s the Rule:
The larger your light source appears relative to your subject, the softer the light will be.
Let me say that again, slowly:
It’s not just about the size of your modifier. It’s about how big it looks from where your subject is standing.
So if your 36" softbox is 8 feet away?
To your subject, it’s not a big light, it’s a tiny glowing dot.
But take that same softbox and bring it in close, 2 to 3 feet from your subject?
Now it looks massive.
It wraps. It kisses the skin. It smooths shadows.
That’s soft light.
Let’s Break the Science Down:
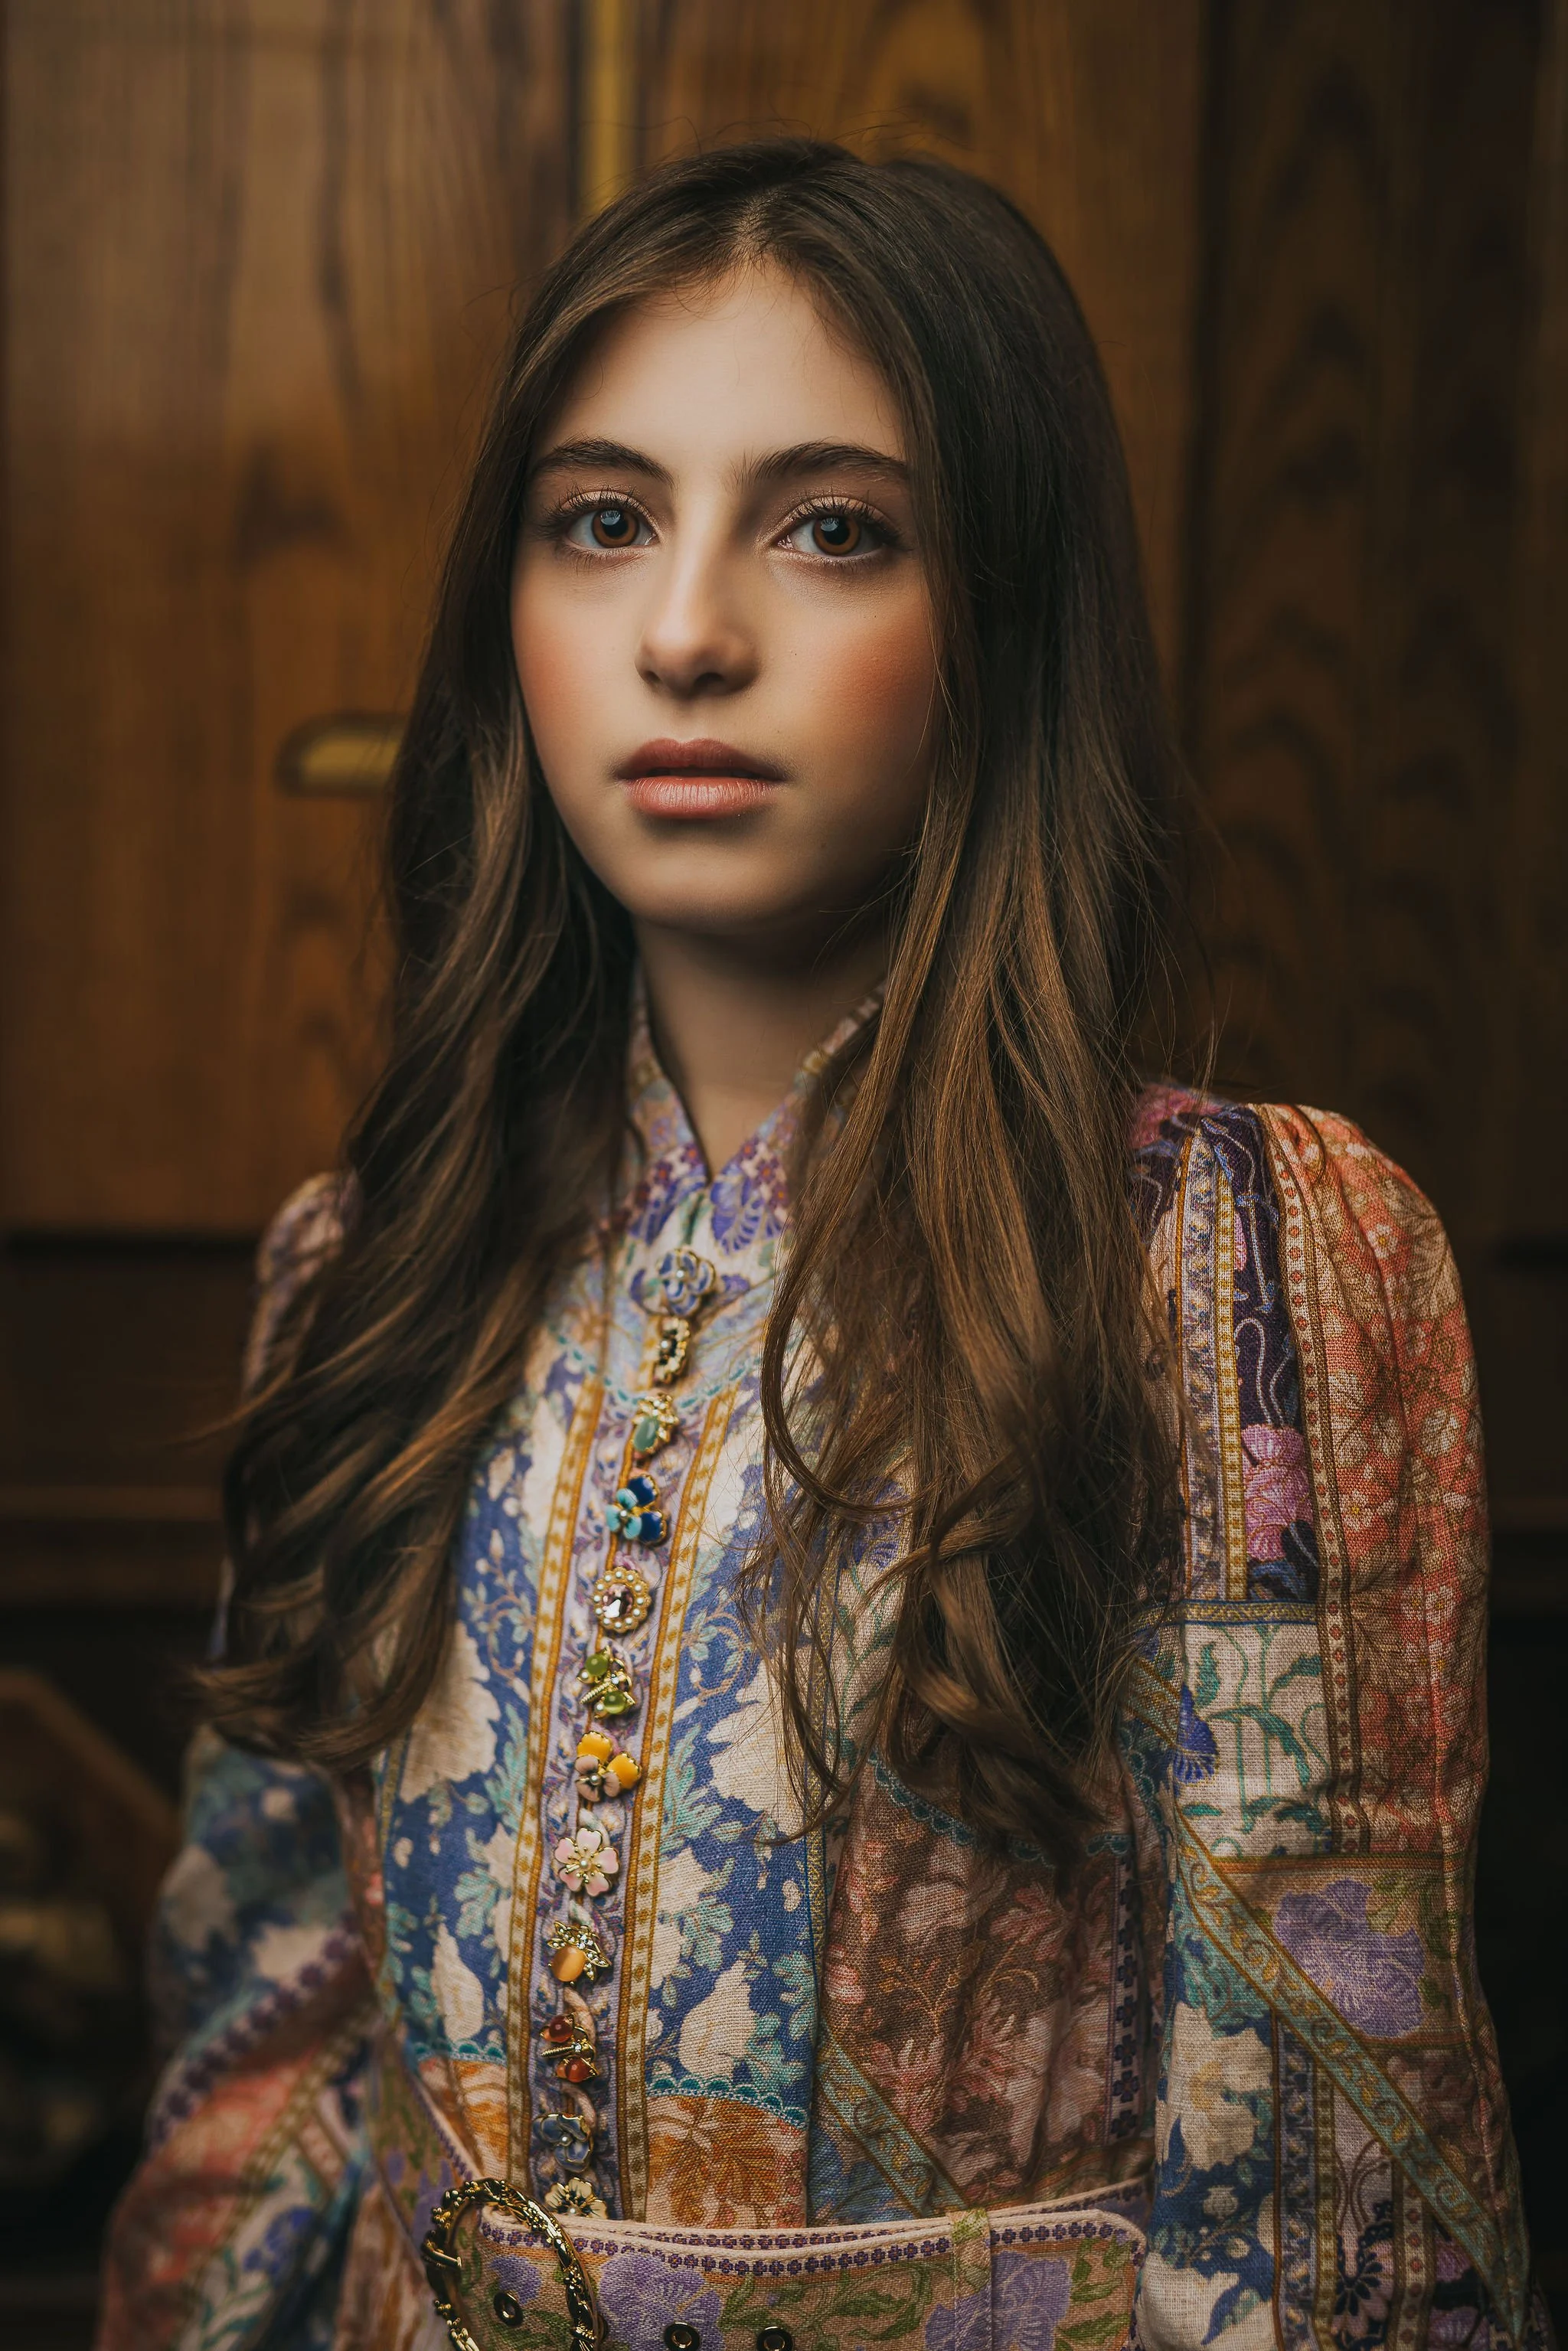
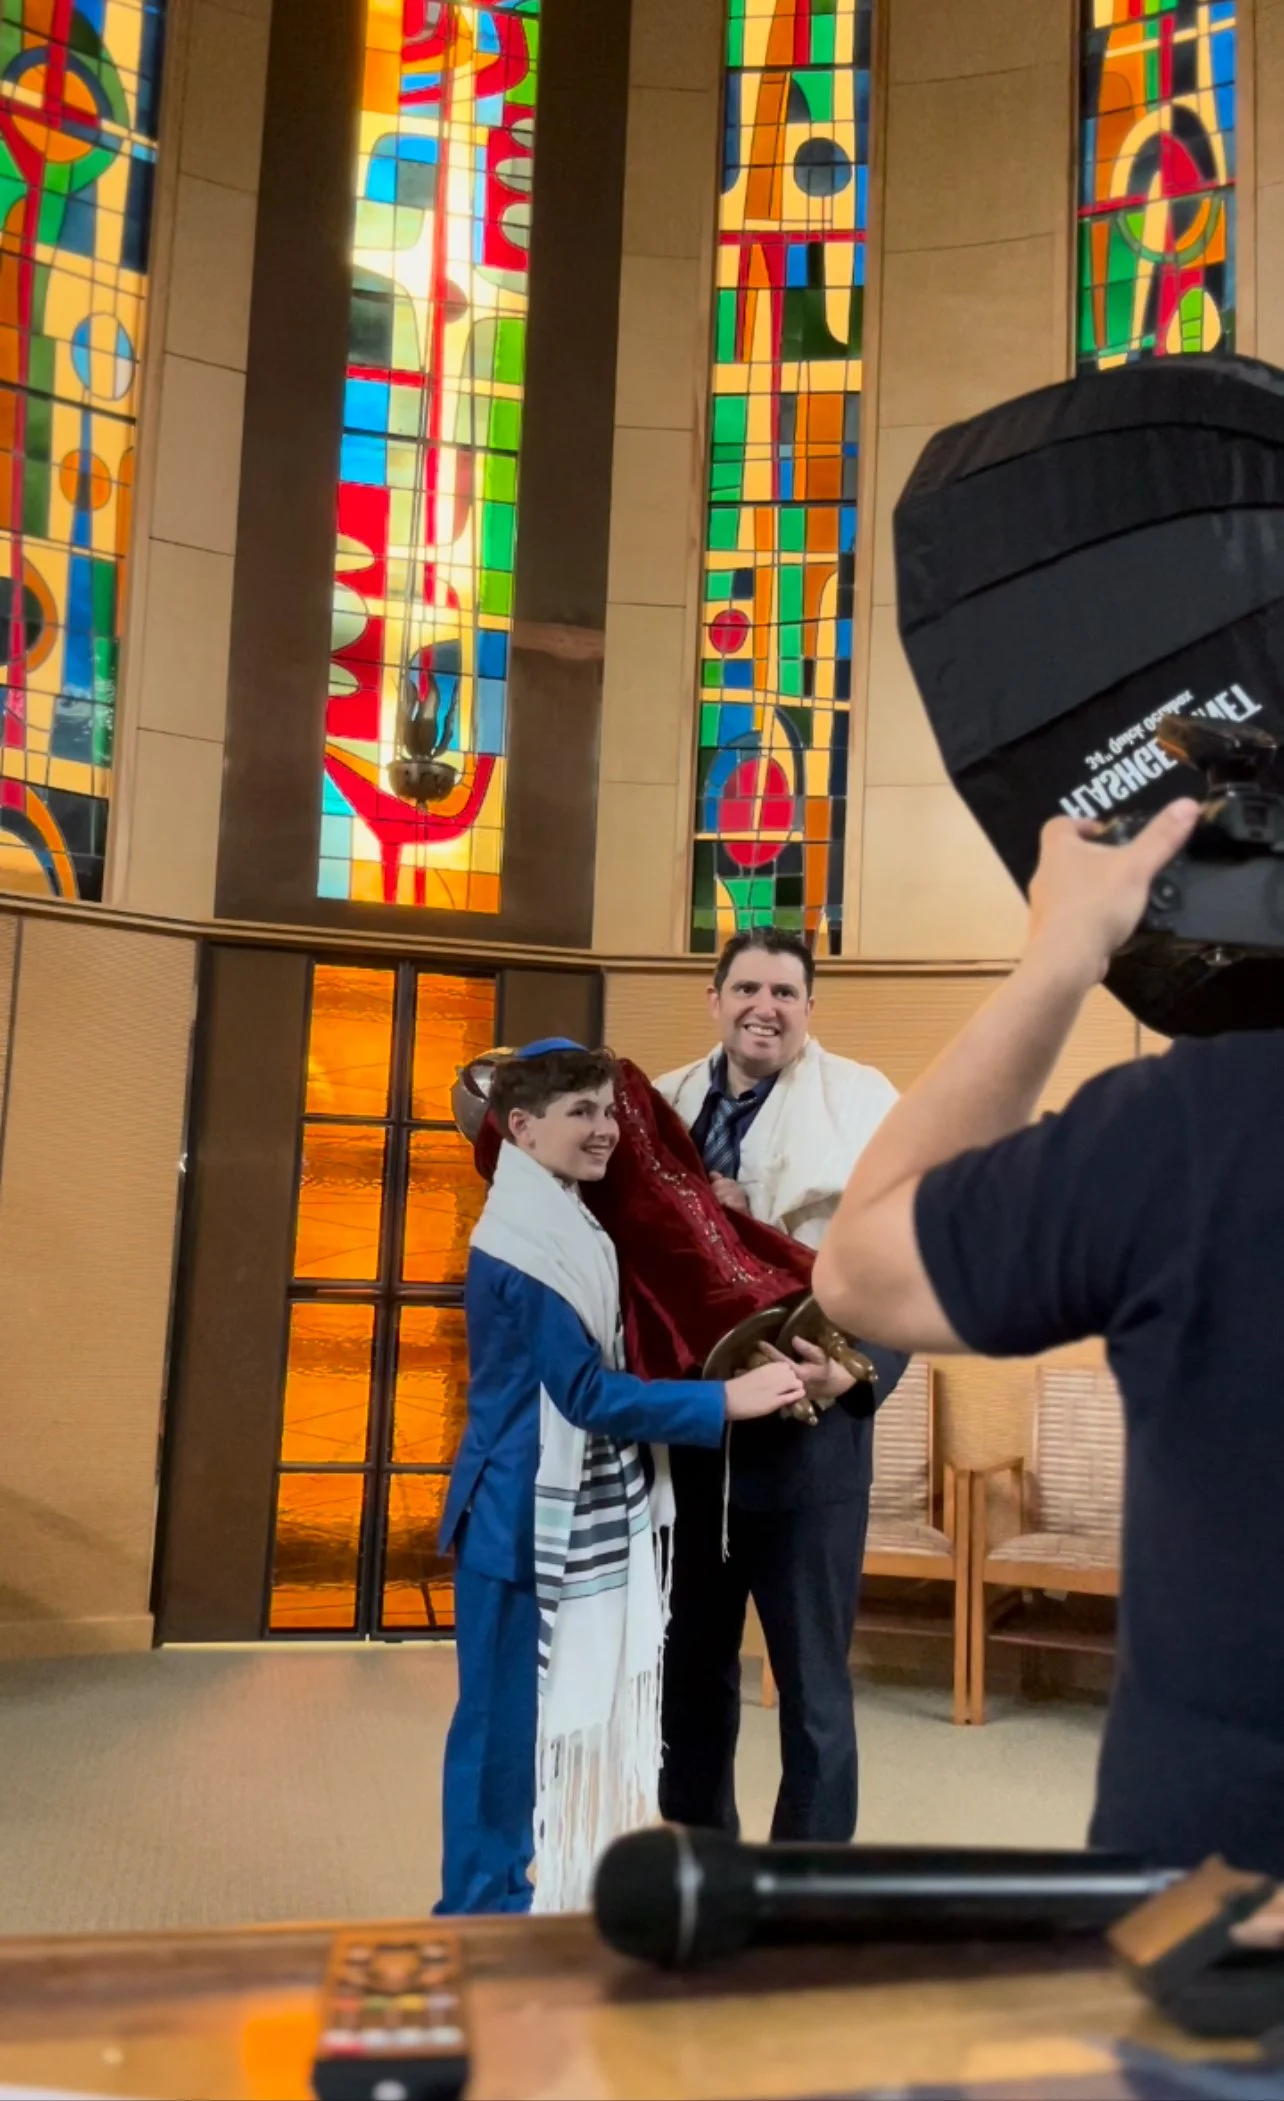
Image from a Bat Mitzvah with soft transitions from light to shadow, due to how close the soft box was — Just outside the frame.
Light travels in straight lines.
The closer the source, the more the light spreads across the subject before those shadows even start forming.
A bigger light area = longer, smoother transitions between light and dark.
That = less contrast, more glow, less retouching in post.
The closer the light to your subject, the less power you have to use.
Common Mistake:You spent all your money on a big modifier... and then put it way back near your tripod.
Don’t be that guy.
Bring. The. Light. Closer.
You want that thing just outside your frame, hugging the edge.
Don’t be afraid of it. Embrace it. That soft glow you’re chasing?
It lives in that closeness.
Which Modifiers Actually Create Soft Light (and Which Ones Don’t)
So you understand now that soft light is about size + distance.
But the modifier you choose is what determines how your light behaves, spreads, and feels.
Let’s break down the real tools that work, and why they matter.
Softboxes (Octa, Rectangular, Strip)
These are the workhorses of soft, controlled lighting.
Why they slap:
Big surface = soft shadows
Built-in diffusion = smooth, clean falloff
Directional control = keeps light where you want it, not on your background, walls, or Uncle Dave’s bald head
Best use:
Portraits, weddings, headshots, maternity, kids, corporate — basically anything with a human face.
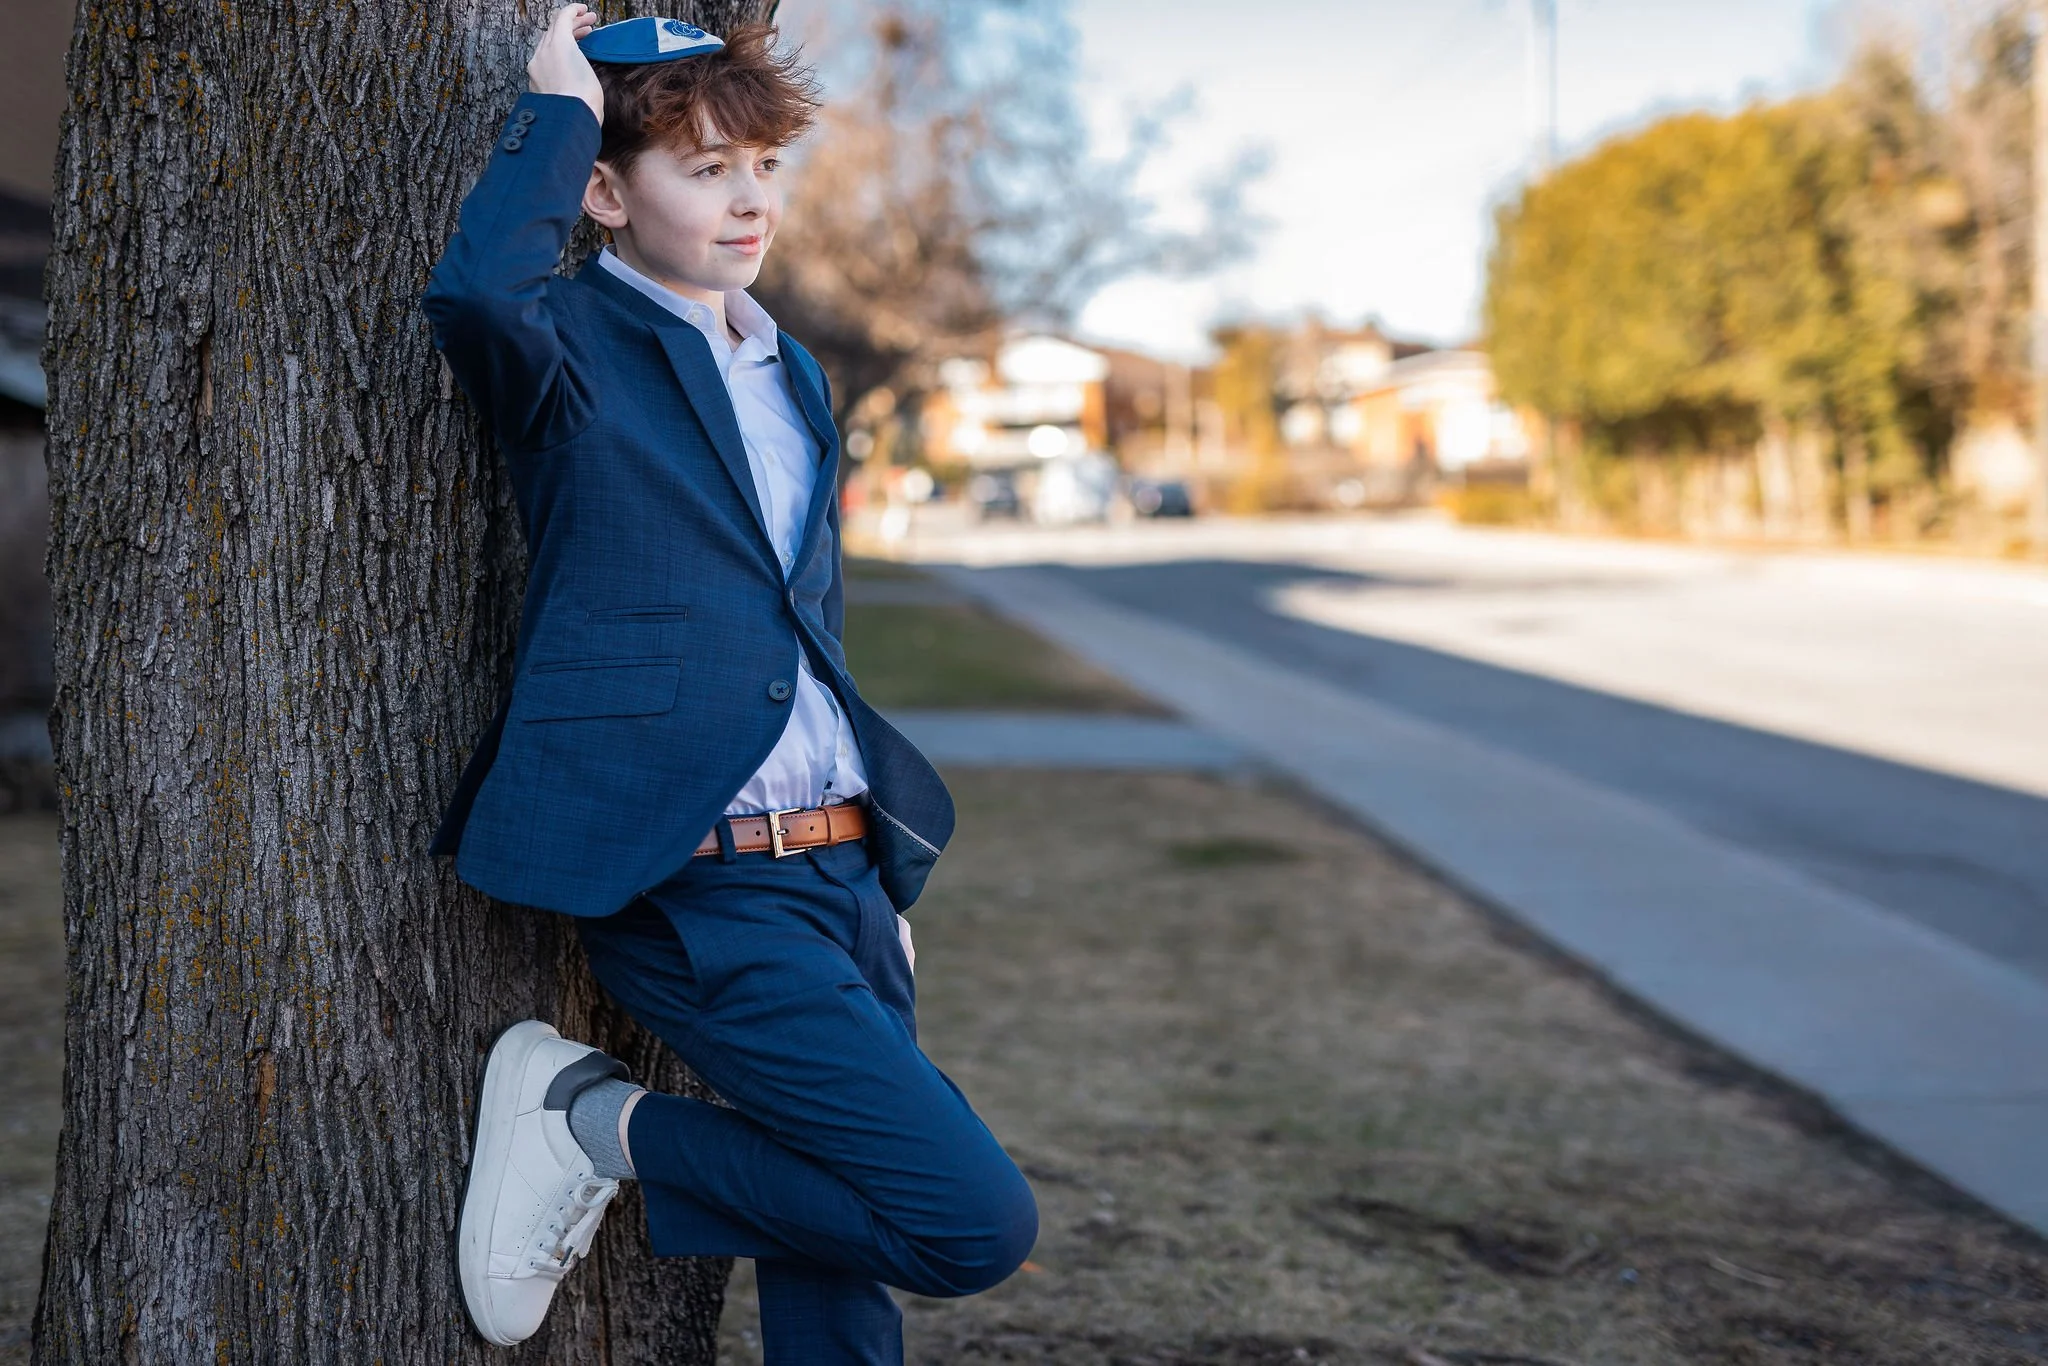
Your Move: Get at least a 32" or 36" for weddings. Bigger if you’re not running-and-gunning. My personal favourit? The 34” quick Octabox. Perfect for individual shots, like a Bar Mitzvah boy or Senior sessions, as well as the occasional family session and Bride and Groom portraits.
Umbrellas (Shoot-Through or Reflective)
These are great for quick setups or when you need big, soft light fast.
Why they’re decent:
Cheap and portable
Great coverage
Big surface area = softness
Why they suck sometimes:
No control. Light spills everywhere.
Shoot-throughs = soft but messy
Reflective = soft but harder to aim
Best use:
Group shots, behind-the-scenes, large spaces, fast-paced environments
Family formals during an event done with a 7 foot umbrella
Your Move: I use a 7 foot reflective umbrella for family formals during weddings. Fast to set up and take down, gives me enough light for both big and small groups like in this example above.
Parabolic Modifiers with Diffusion
These babies are like Ferraris of soft light — when used correctly.
Why they’re fire:
Deep throw + control + softness
Can be used hard or soft depending on the setup
Looks cinematic as hell
Why they’re tricky:
Expensive
Bulky
Needs distance and patience
Best use:
Fashion, editorial, signature wedding portraits where you’ve got time and control
Your Move: If you’re gonna use one, add a diffuser or inner baffle to soften the hell out of it. Otherwise, it’s punching too hard for this topic.
What NOT to Rely On for Soft Light:
Bare Bulb Flash → not soft, not controlled, total chaos
Speedlights with no modifier → welcome to raccoon-eye city
Cheap knockoff softboxes with no diffusion → hard shadows with a false sense of security
Your camera’s pop-up flash → delete your camera. I’m kidding. (But also… don’t.)
Now, if you want a total breakdown of real-world lighting setups I use to get that soft cinematic wrap, just click here
Next week we will talk about high contrast harsher light, and how to use it to create highly cinematic pictures. As usually, don’t forget to drop that follow on my Instagram @rochastudio and if you have any questions for me, I am just a text message away.

How to Shoot Stunning Wedding Photos in the Worst Possible Light (Yes, Even at Noon)
How to Shoot Stunning Wedding Photos in the Worst Possible Light outdoors

Open Shade: Your best hack when shooting in a bright sunny day without Off camera Flash
What’s open shade and why is it your best hack on a bright sunny day
What Is Open Shade in Photography?
Open shade is your best friend when you're shooting outside in harsh sunlight without off-camera flash.
It’s the type of shade that’s not blocked in on all sides. Light is still bouncing in, but you’re protected from direct sun. Think: the side of a building, under a tree canopy, beside a wall, or just outside a doorway.
You’re not in full darkness. You’re in a soft light pocket, diffused, flattering and even.
And it’s a game changer when you’ve got no gear, no time, and a sun that’s trying to cook your couple alive.
Why Open Shade Matters (Especially When You’re Gear-Less in the Sun)
Here’s the deal:
Direct sunlight sucks. It causes hard shadows, squinty eyes, blown-out highlights, and sweat-streaked foreheads. Not sexy. Not flattering. Not usable. If you adjust your camera settings to your couple’s skin (Or white wedding dress), you will blow up the sky. If you adjust for the bright sky, your subjects will be severely underexposed. I Avoid direct sunlight like the plague. Check this image below for example. Nadav here has no choice but to squint (Even tho it was 5pm, imagine at 1 pm). Harsh shadows on his nose, under his hair, under his neck. Not comfortable to your subjects, and not the best look for your final deliveries.
Nadav under direct sunlight
Open shade solves all that. Why?
Even lighting on the face. No raccoon eyes from overhead sun.
Softer shadows. Better skin, better contrast, easier edits.
No blown highlights or overexposed backgrounds.
Your couple won’t be squinting like they’re staring into the apocalypse.
When you’re outside at noon with no flash and no time, open shade is the cheat code. It's nature’s softbox, if you know how to find it.
How to Find Open Shade Fast on a Wedding Day
No time. No gear. No excuses. Here’s how you find open shade on the fly:
1. Look for Structures That Block Overhead Sun
Buildings. Porches. Overhangs. Big trucks. Trees (with thick leaves, carefully with hot spots). You’re not looking for full darkness — just something that blocks the sun above, while still letting light spill in from the front or sides.
2. Use the Edge of the Shade
Don’t bury your couple deep in the shadow. You want to shoot right on the edge — where the light from the open sky hits softly, but direct sun is gone.
That edge is where the magic lives.
3. Angle Their Face Toward the Light Source
Even in shade, you’ve got a direction of light (usually from the open sky). Turn your couple toward that light, just like you would with a softbox. Boom — clean skin tones, catchlights, flattering falloff.
4. Use Reflective Surfaces Nearby
Light-colored walls, concrete, sand, even white cars — they bounce light back into your subject’s face like a natural reflector. Use them. That’s free lighting, baby.
5. Always Check the Background
Shade won’t save you if there’s a trash bin or 18 parked cars behind your couple. Move around until the background works. Trees, walls, neutral tones. Clean it up in-camera.
But for me, the most important tip I can give you is to make sure the background isn’t exposed to that big bright sun light. If the background isn’t exposed to that big bright sunlight, you can actually shoot wide open under direct sunlight.
On these examples below, on the first picture, the background is exposed to the sunlight. Even tho I managed to lower the highlights in the background, it is still overexposed when compared to the subject. In the rest of the images, I moved around until I found a spot where the background wasn’t exposed to the light. The settings were exactly the same.
F2
SS (Shutter speed 1/500)
ISO 100

On my next article, I will teach you how to shoot under direct sunlight, if you don’t have a choice, both using only natural light only AND with OCF (Off Camera Flash)
Feel free to email or DM me on Instagram any time by clicking here.
Braulio Rocha
The Braulio Way

Shooting Portraits In Less Than Ideal Locations: A Guide to Overcome Its Challenges
Struggling when shooting in less than ideal locations? This blog has all the answers for you

What Gear You NEED When Starting a Wedding Photography Business
Starting a wedding photography business means stepping into moments you only get once. That’s why the right gear isn’t optional. Its essential

So You Want to Be a Wedding Photographer? Good. Let’s Get Real.
So you want to be a wedding photographer? This isn’t just about pretty pictures — it’s about pressure, precision, and presence. In this raw, no-fluff post, I break down the truth behind starting in this industry, why assisting is your golden ticket, and how to build a career that actually lasts. If you're ready to stop guessing and start learning the real way — this is for you.